 Image Source: Unsplash
Let's start with understanding the different types of media services AWS provides. These are broken into two parts: Elemental Media Services and AWS Media Services
Elemental Media Services: These services were developed by a company called Elemental which was eventually acquired by AWS.
- MediaConnect: High quality transport service for live video.
- MediaLive: Live video encoding service.
- MediaPackage: Prepare and protect your video for distribution.
- MediaStore: Highly optimized storage service for live streaming.
- MediaConvert: File based video transcoding service. Used for VOD.
- MediaTailor: Service to monetize live or on-demand video with server-side splicing.
AWS Media Services: These are AWS in-house developed services.
- Kinesis Video Streams
- Elastic Transcoder

Alright, looking at the diagram above it is clear that MediaConnect, MediaLive, MediaPackage and MediaStore services are used for streaming live videos. However, in this blog we will be using MediaLive and MediaPackage service for live streaming.
So, let's get started. Firstly, we need to create a channel with AWS MediaPackage where we will be sending encoded live video.
It's now time visit MediaPackage service and create a new channel.
We will only be providing name and description for the channel as we do not want to distribute our live stream via CloudFront.

Once your channel has been created scroll down until Endpoints section and let's create one so that we can watch live streaming video once the entire setup is complete.
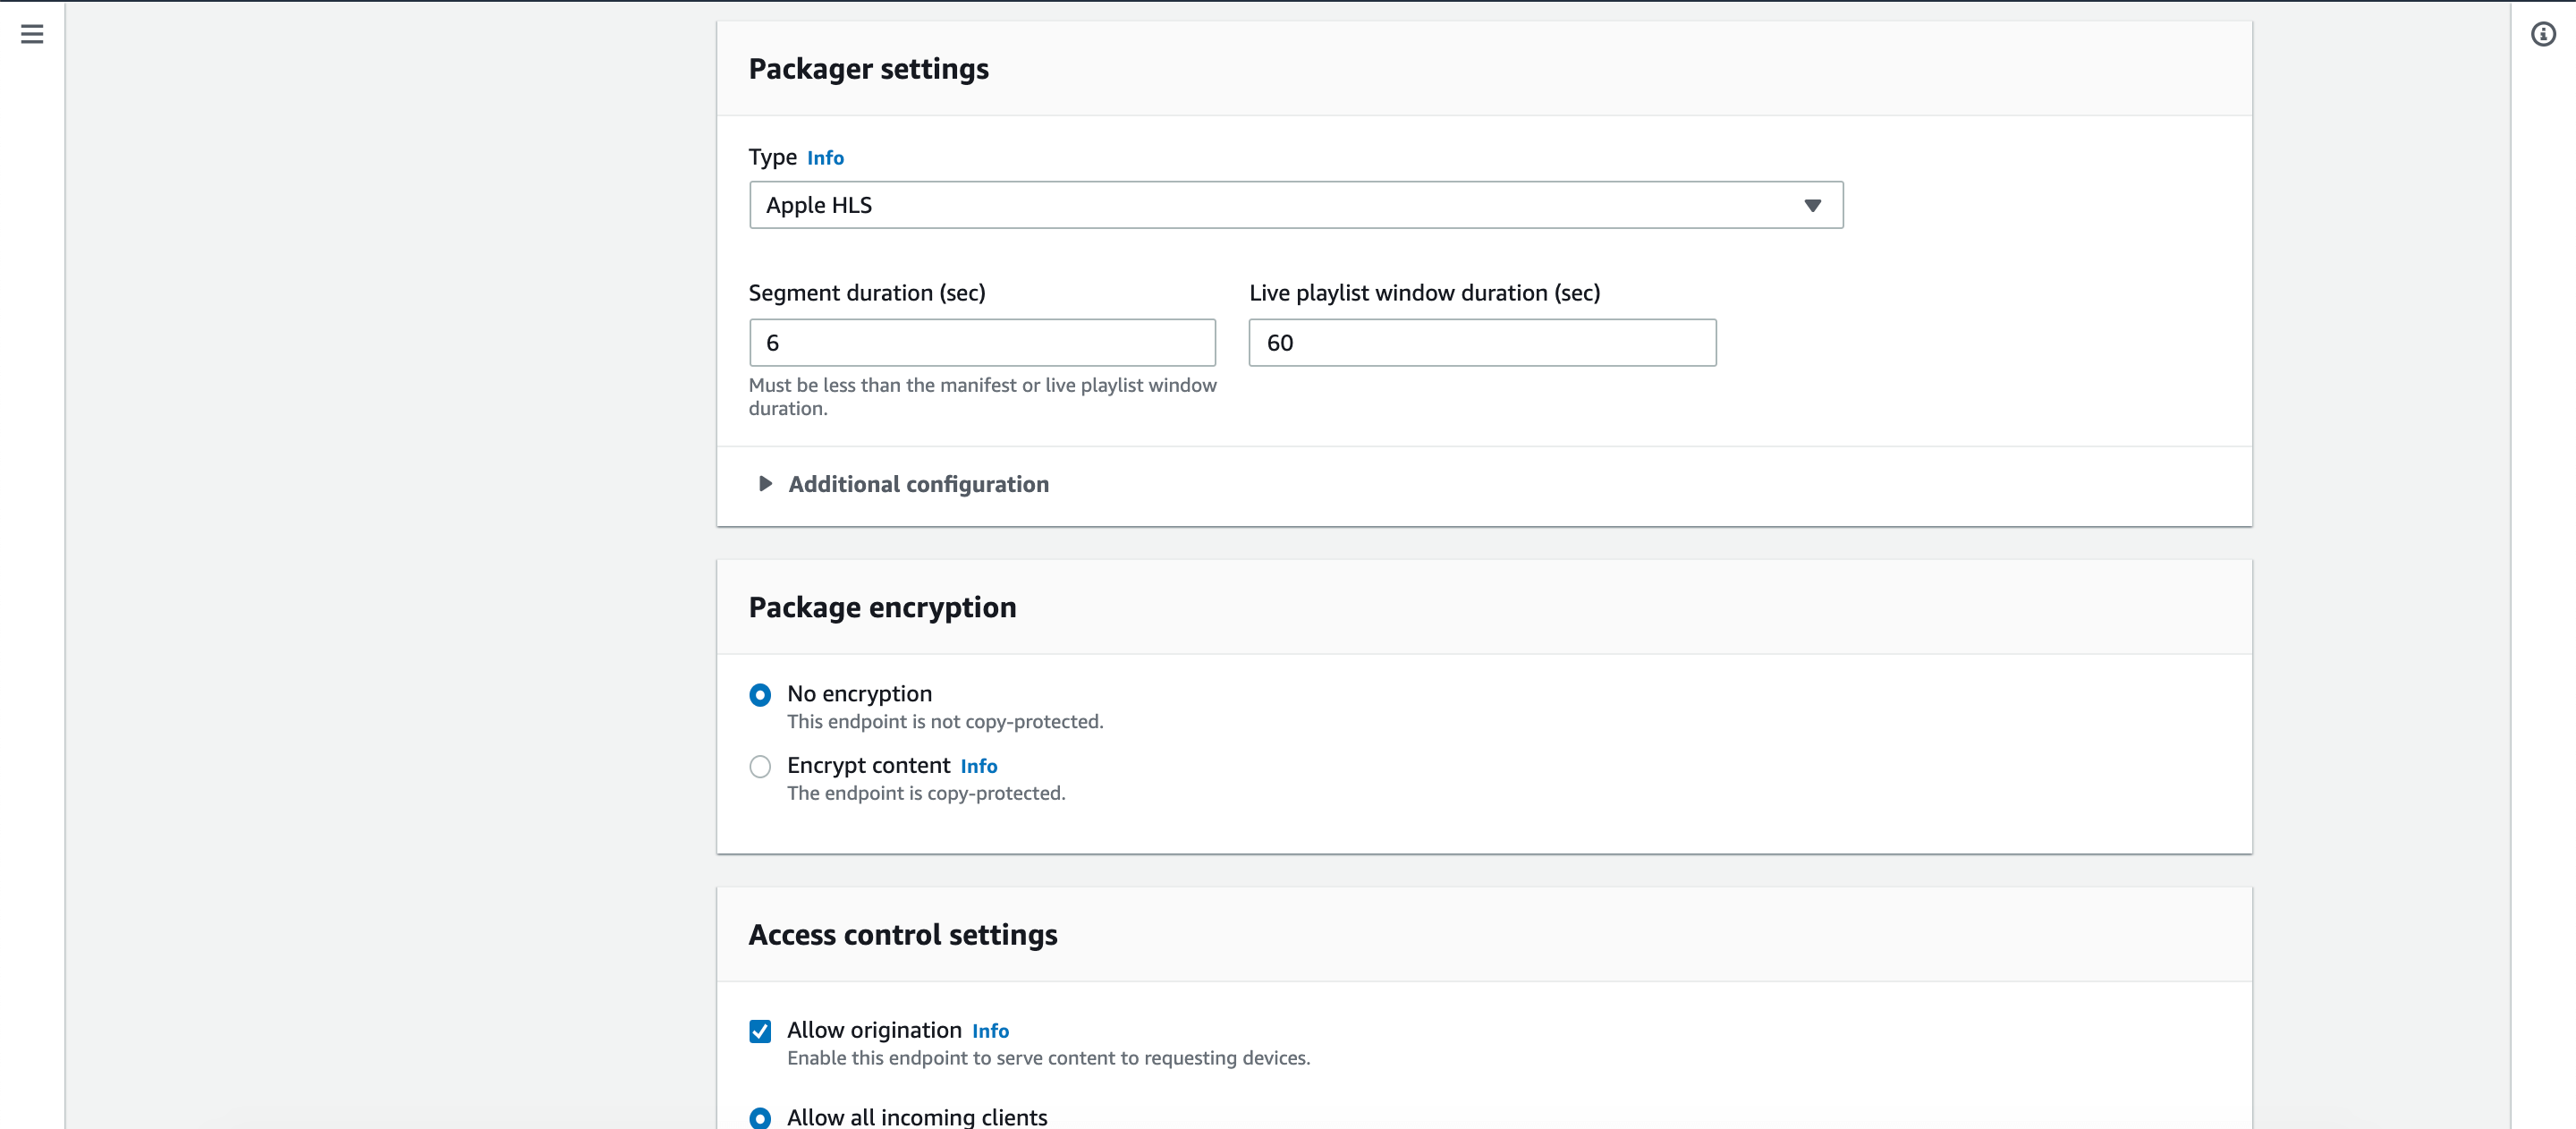
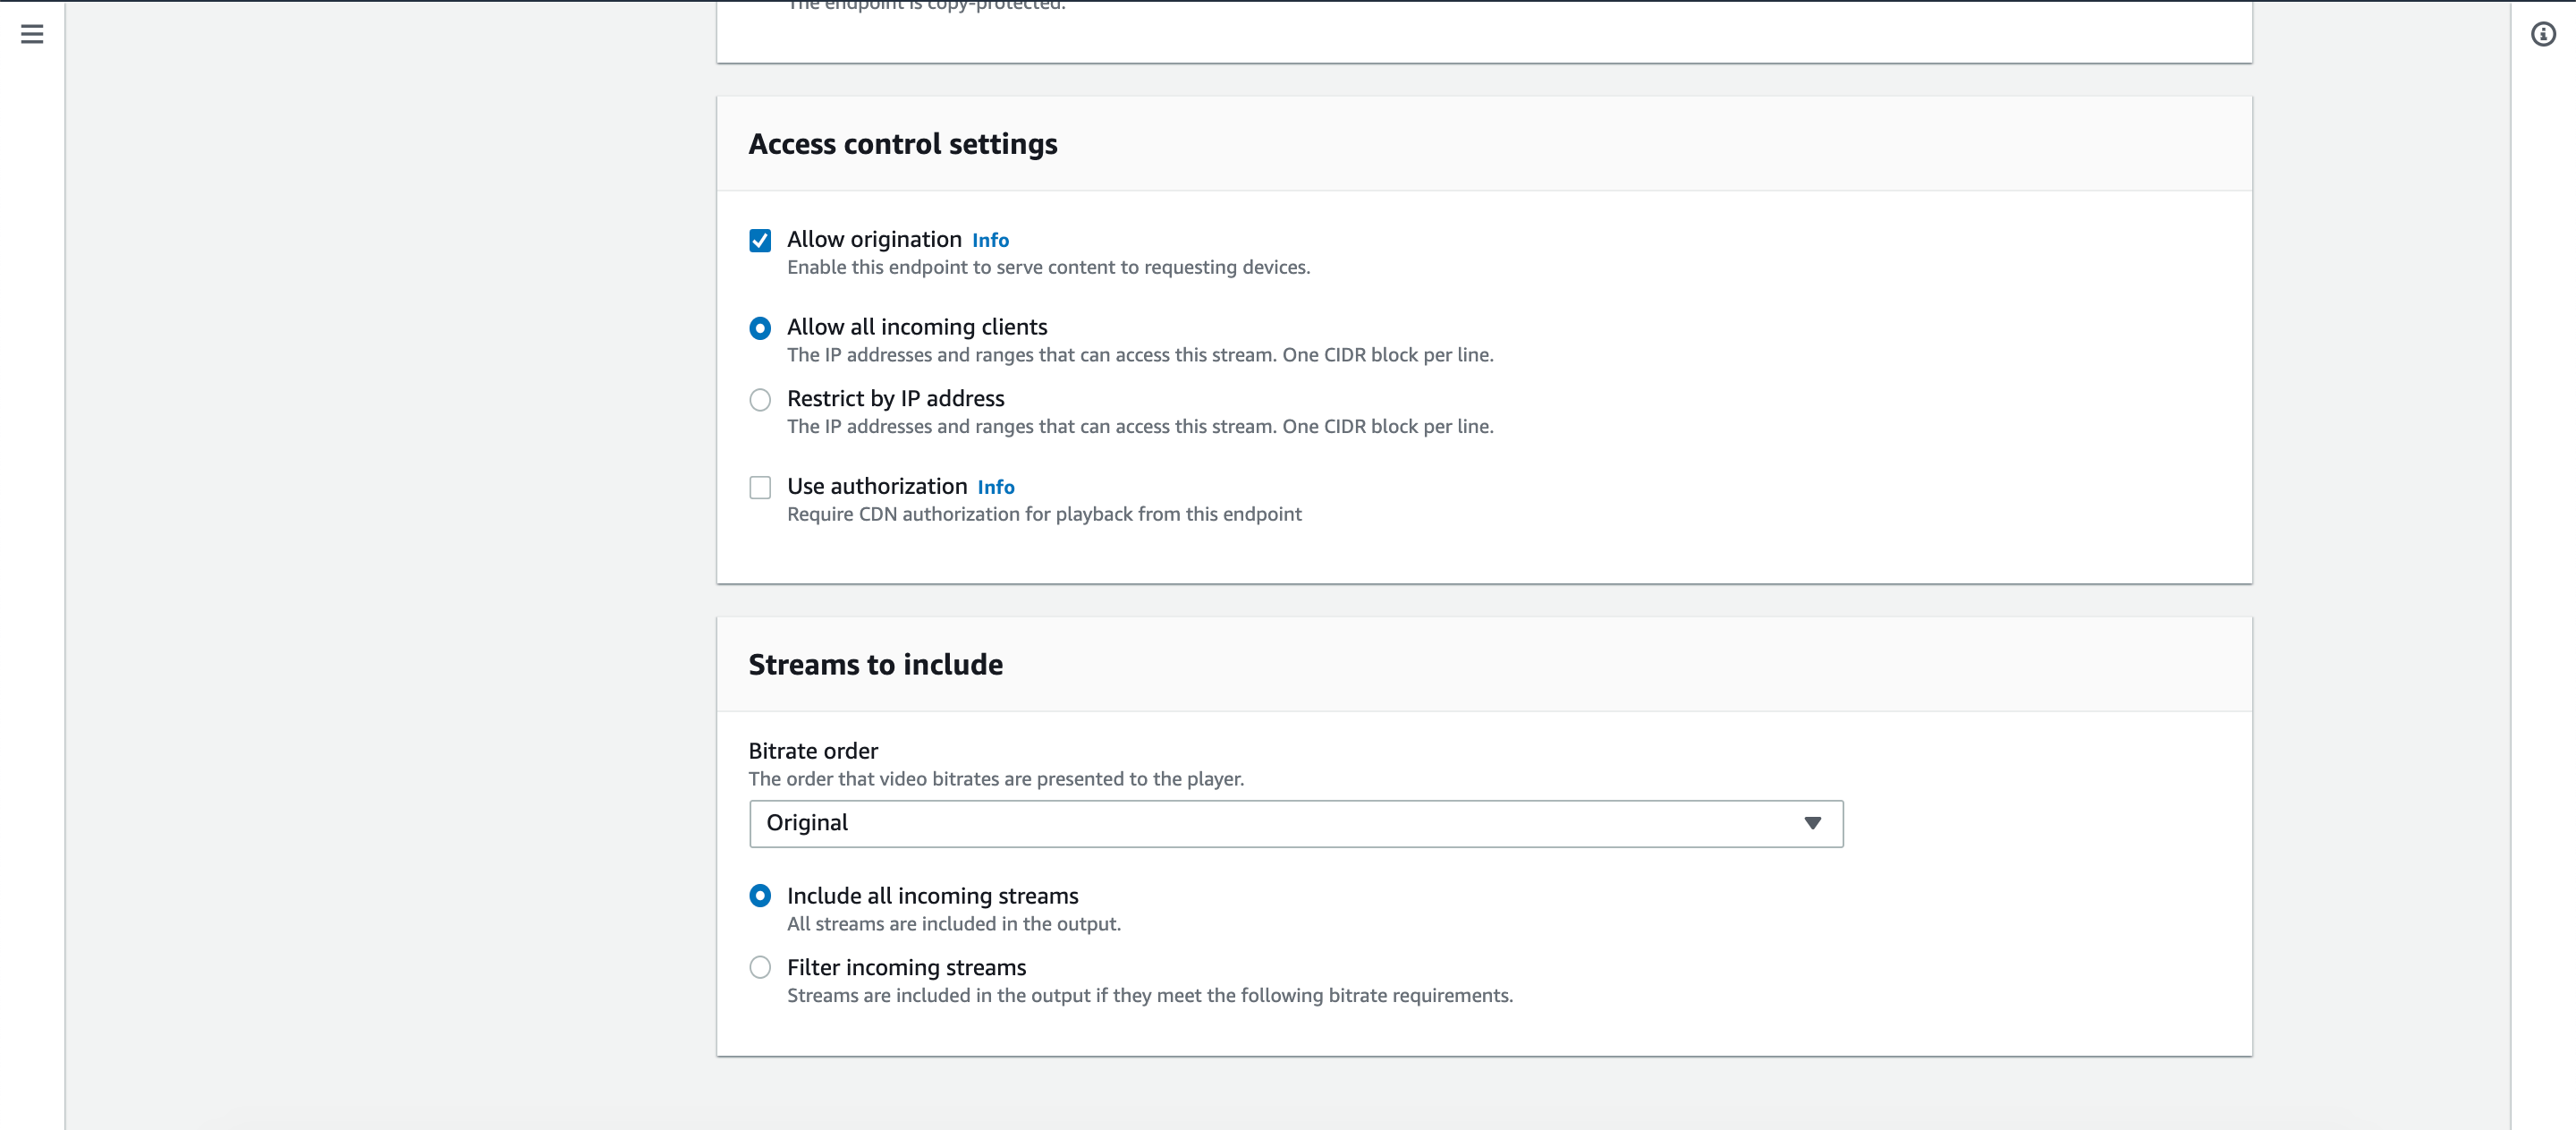
Just provide the endpoint name and leave all other settings untouched.
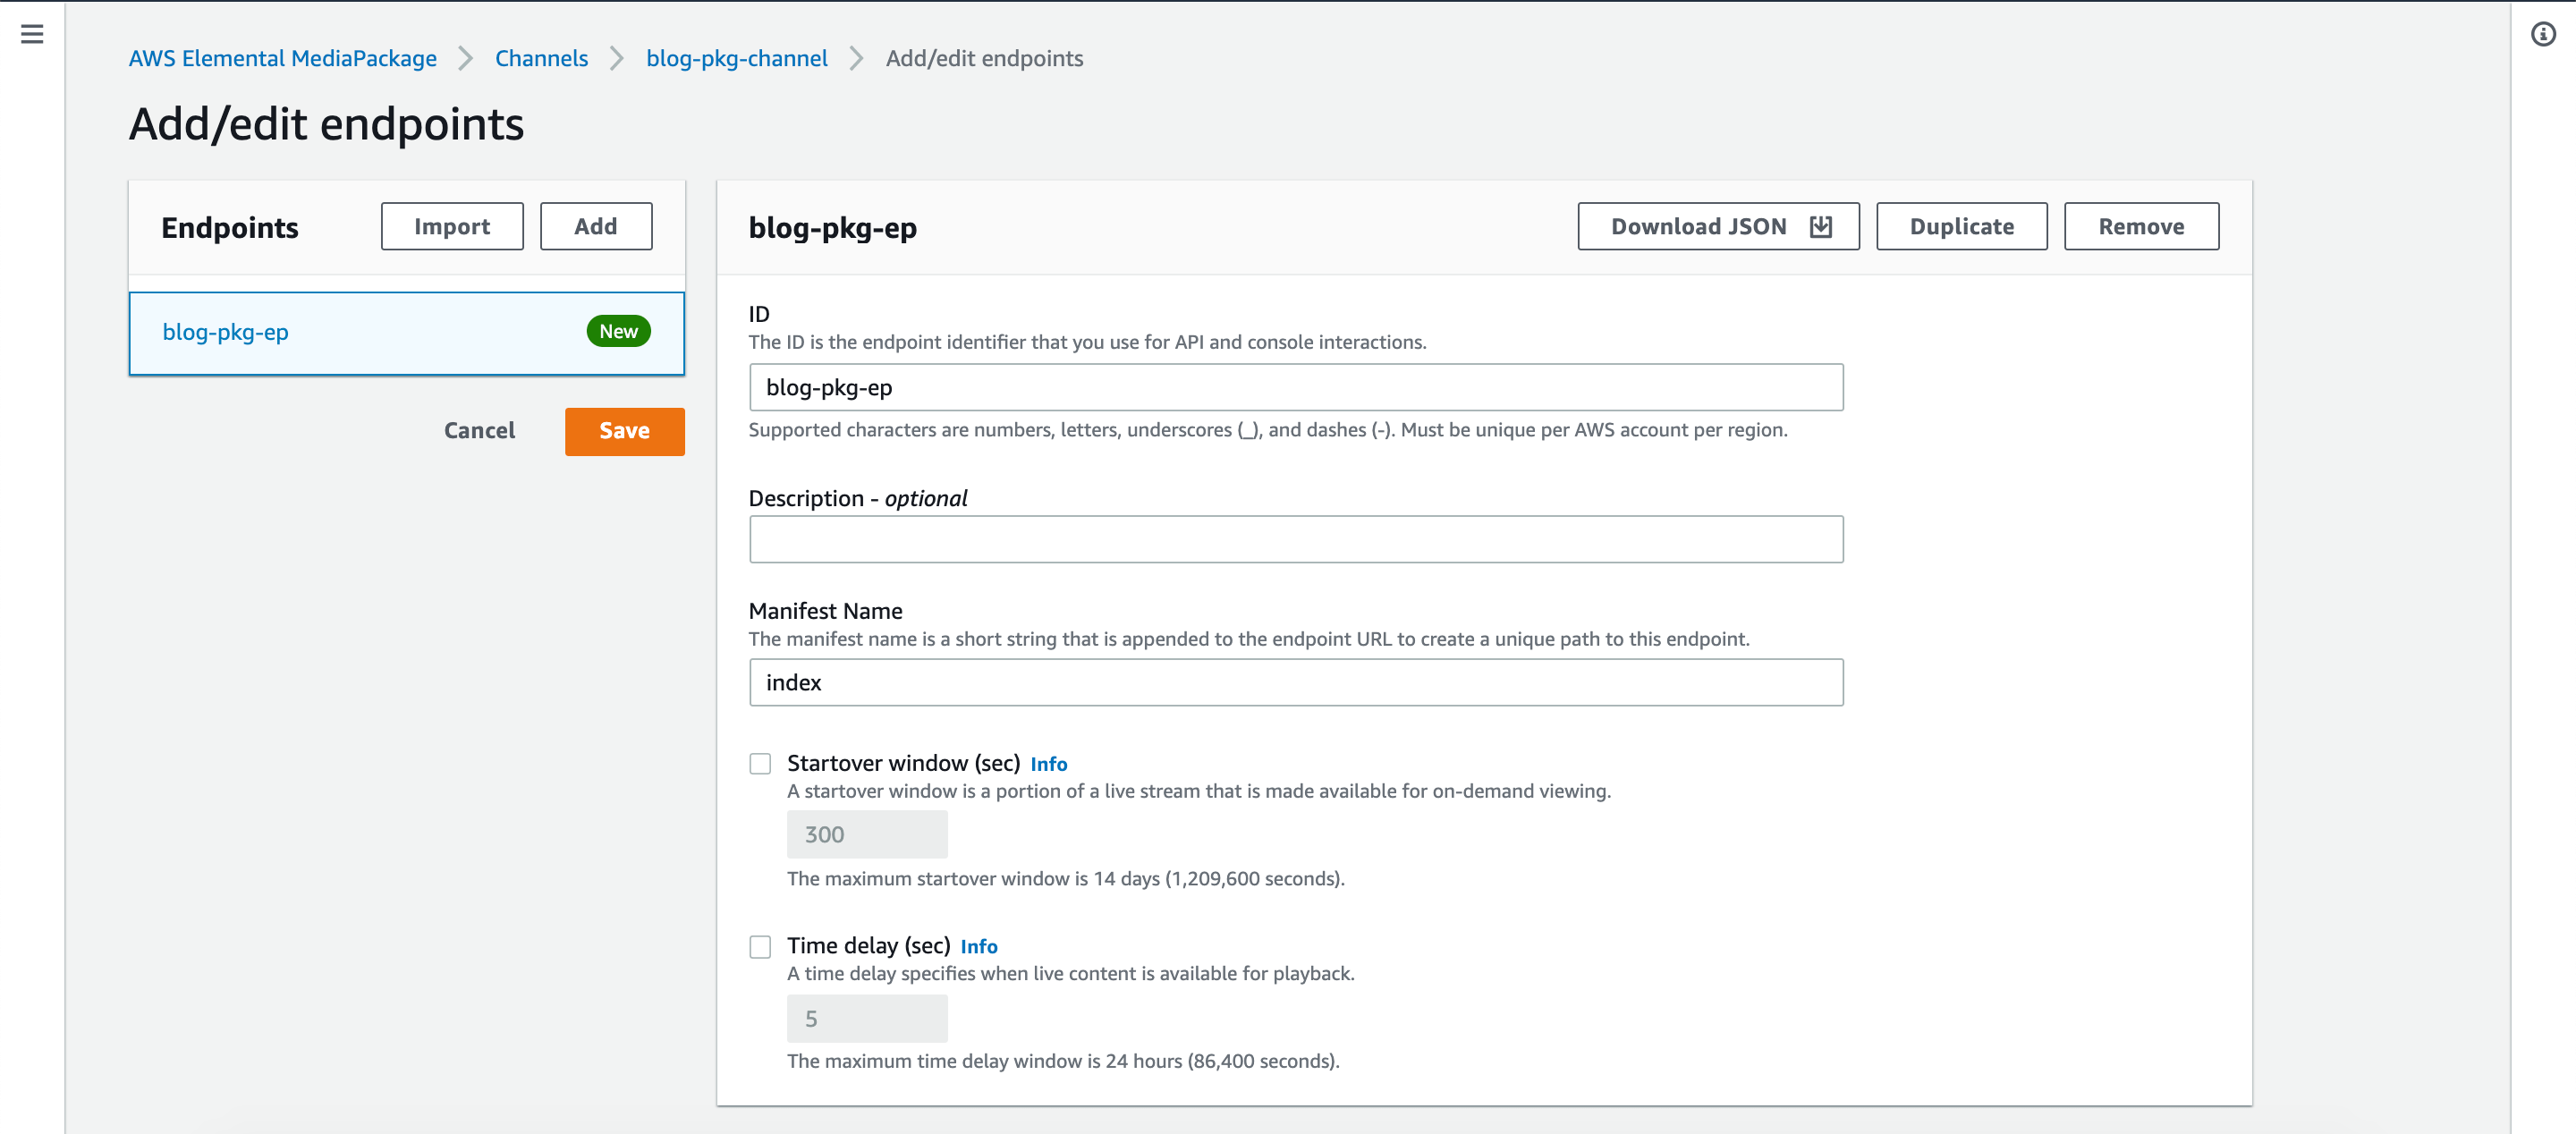
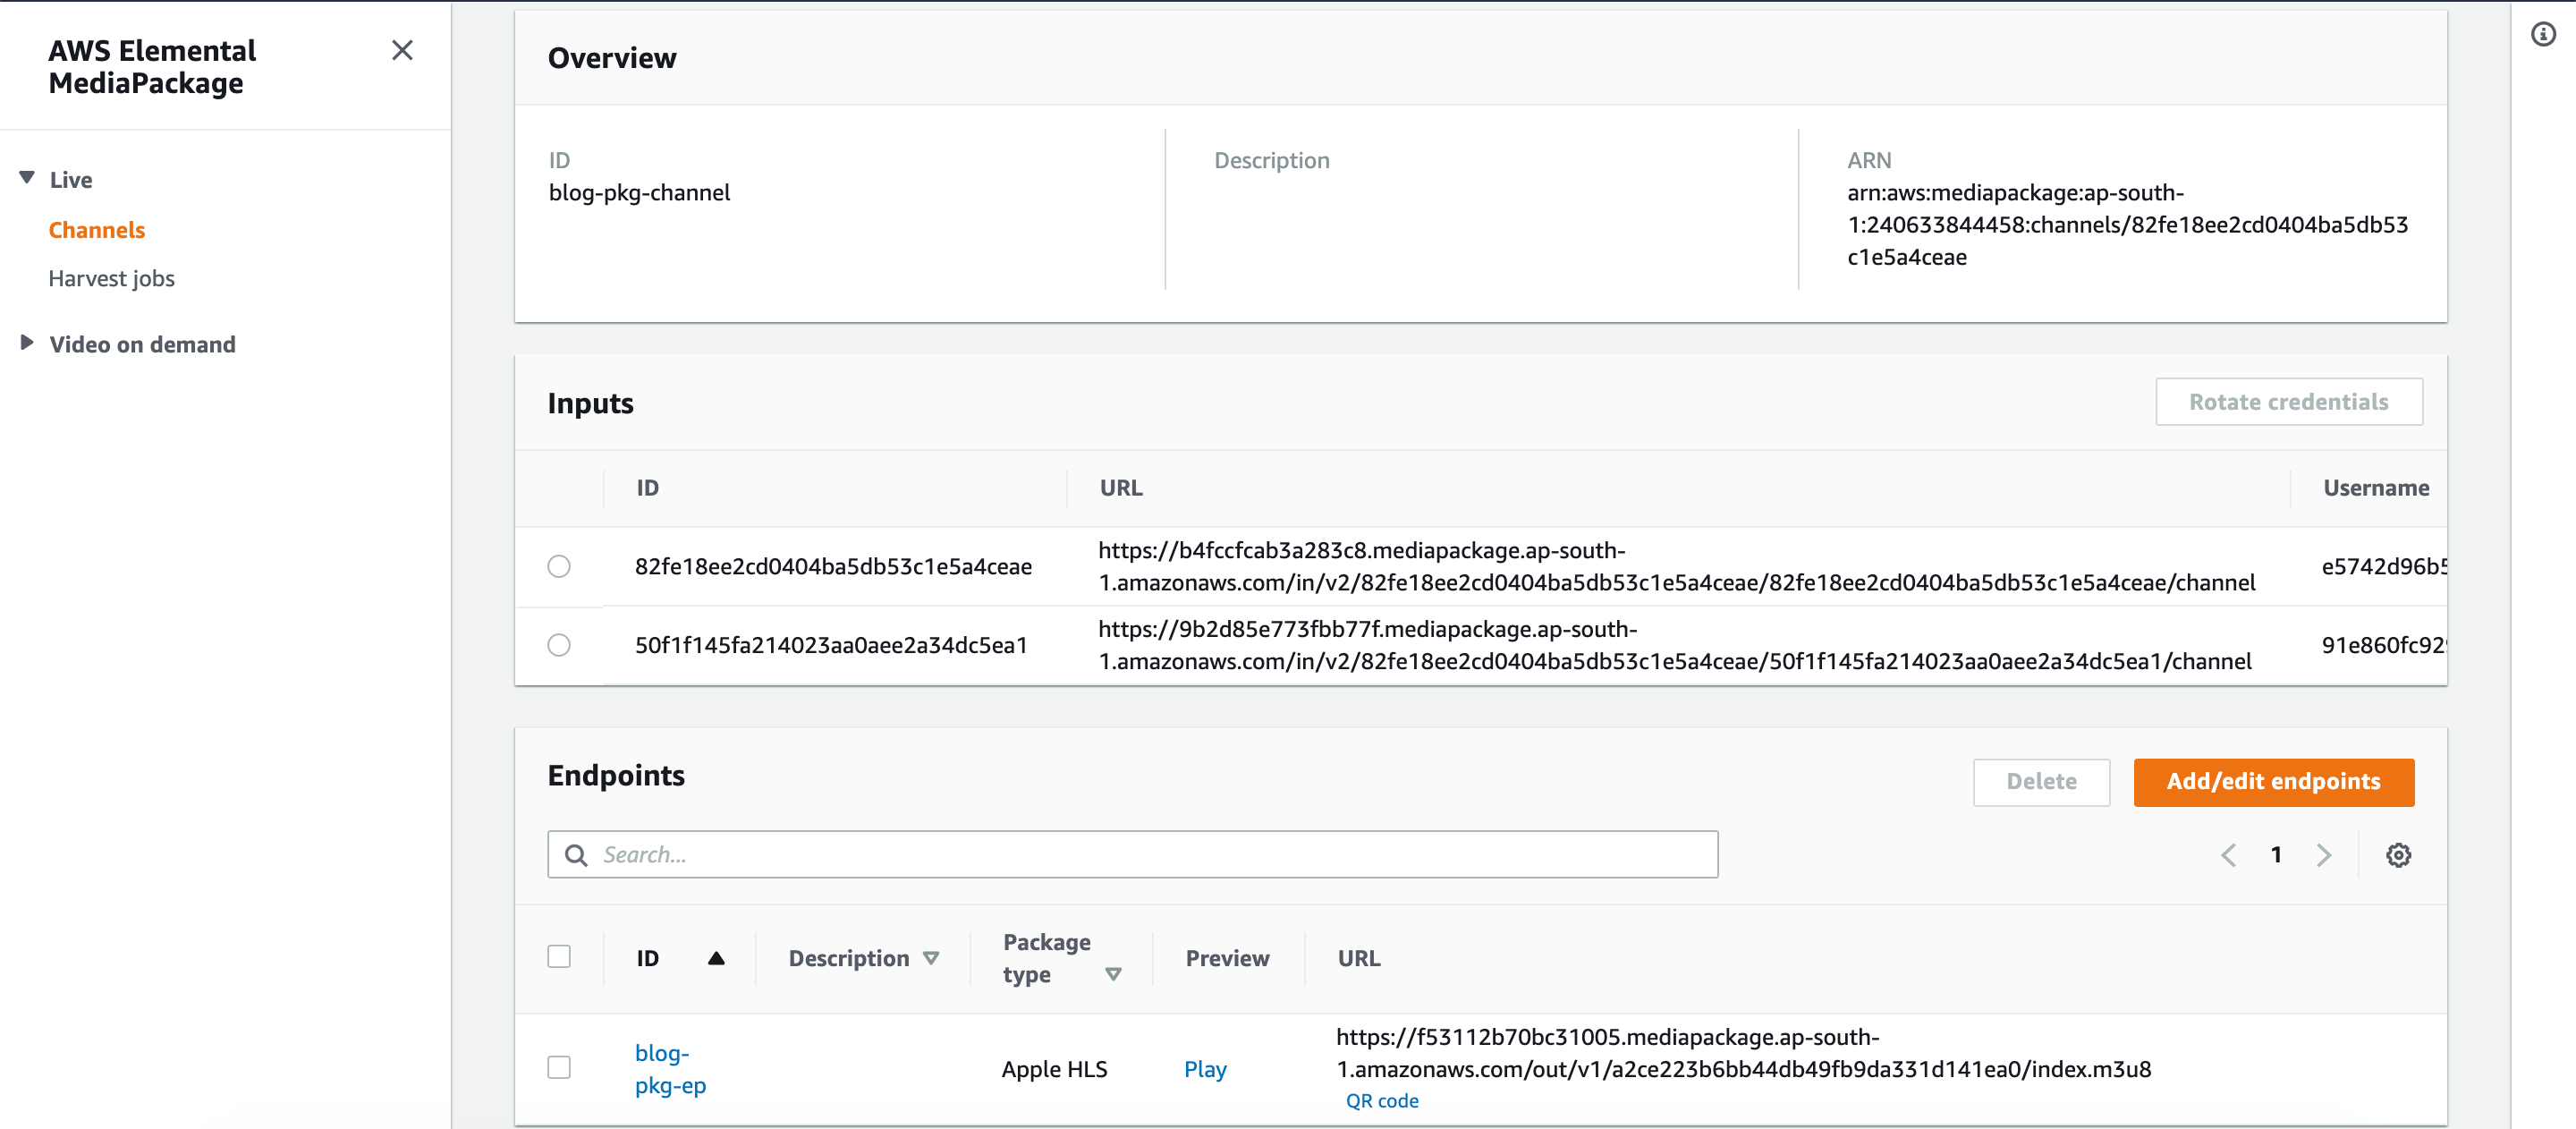
Once your endpoint is created you will see an entry in Endpoints section with an option to play your live stream within the browser itself or a public URL to play using your favourite player.
That's all we need to do with AWS MediaPackage. We will come back to this once we setup MediaLive service to watch our live stream.
Let's open MediaLive in a new tab/window as we will have to re-visit MediaPackage for picking up some information to setup our MediaLive channel.
MediaLive involves configuring multiple things like channel, input and output details. Let's do it one by one.
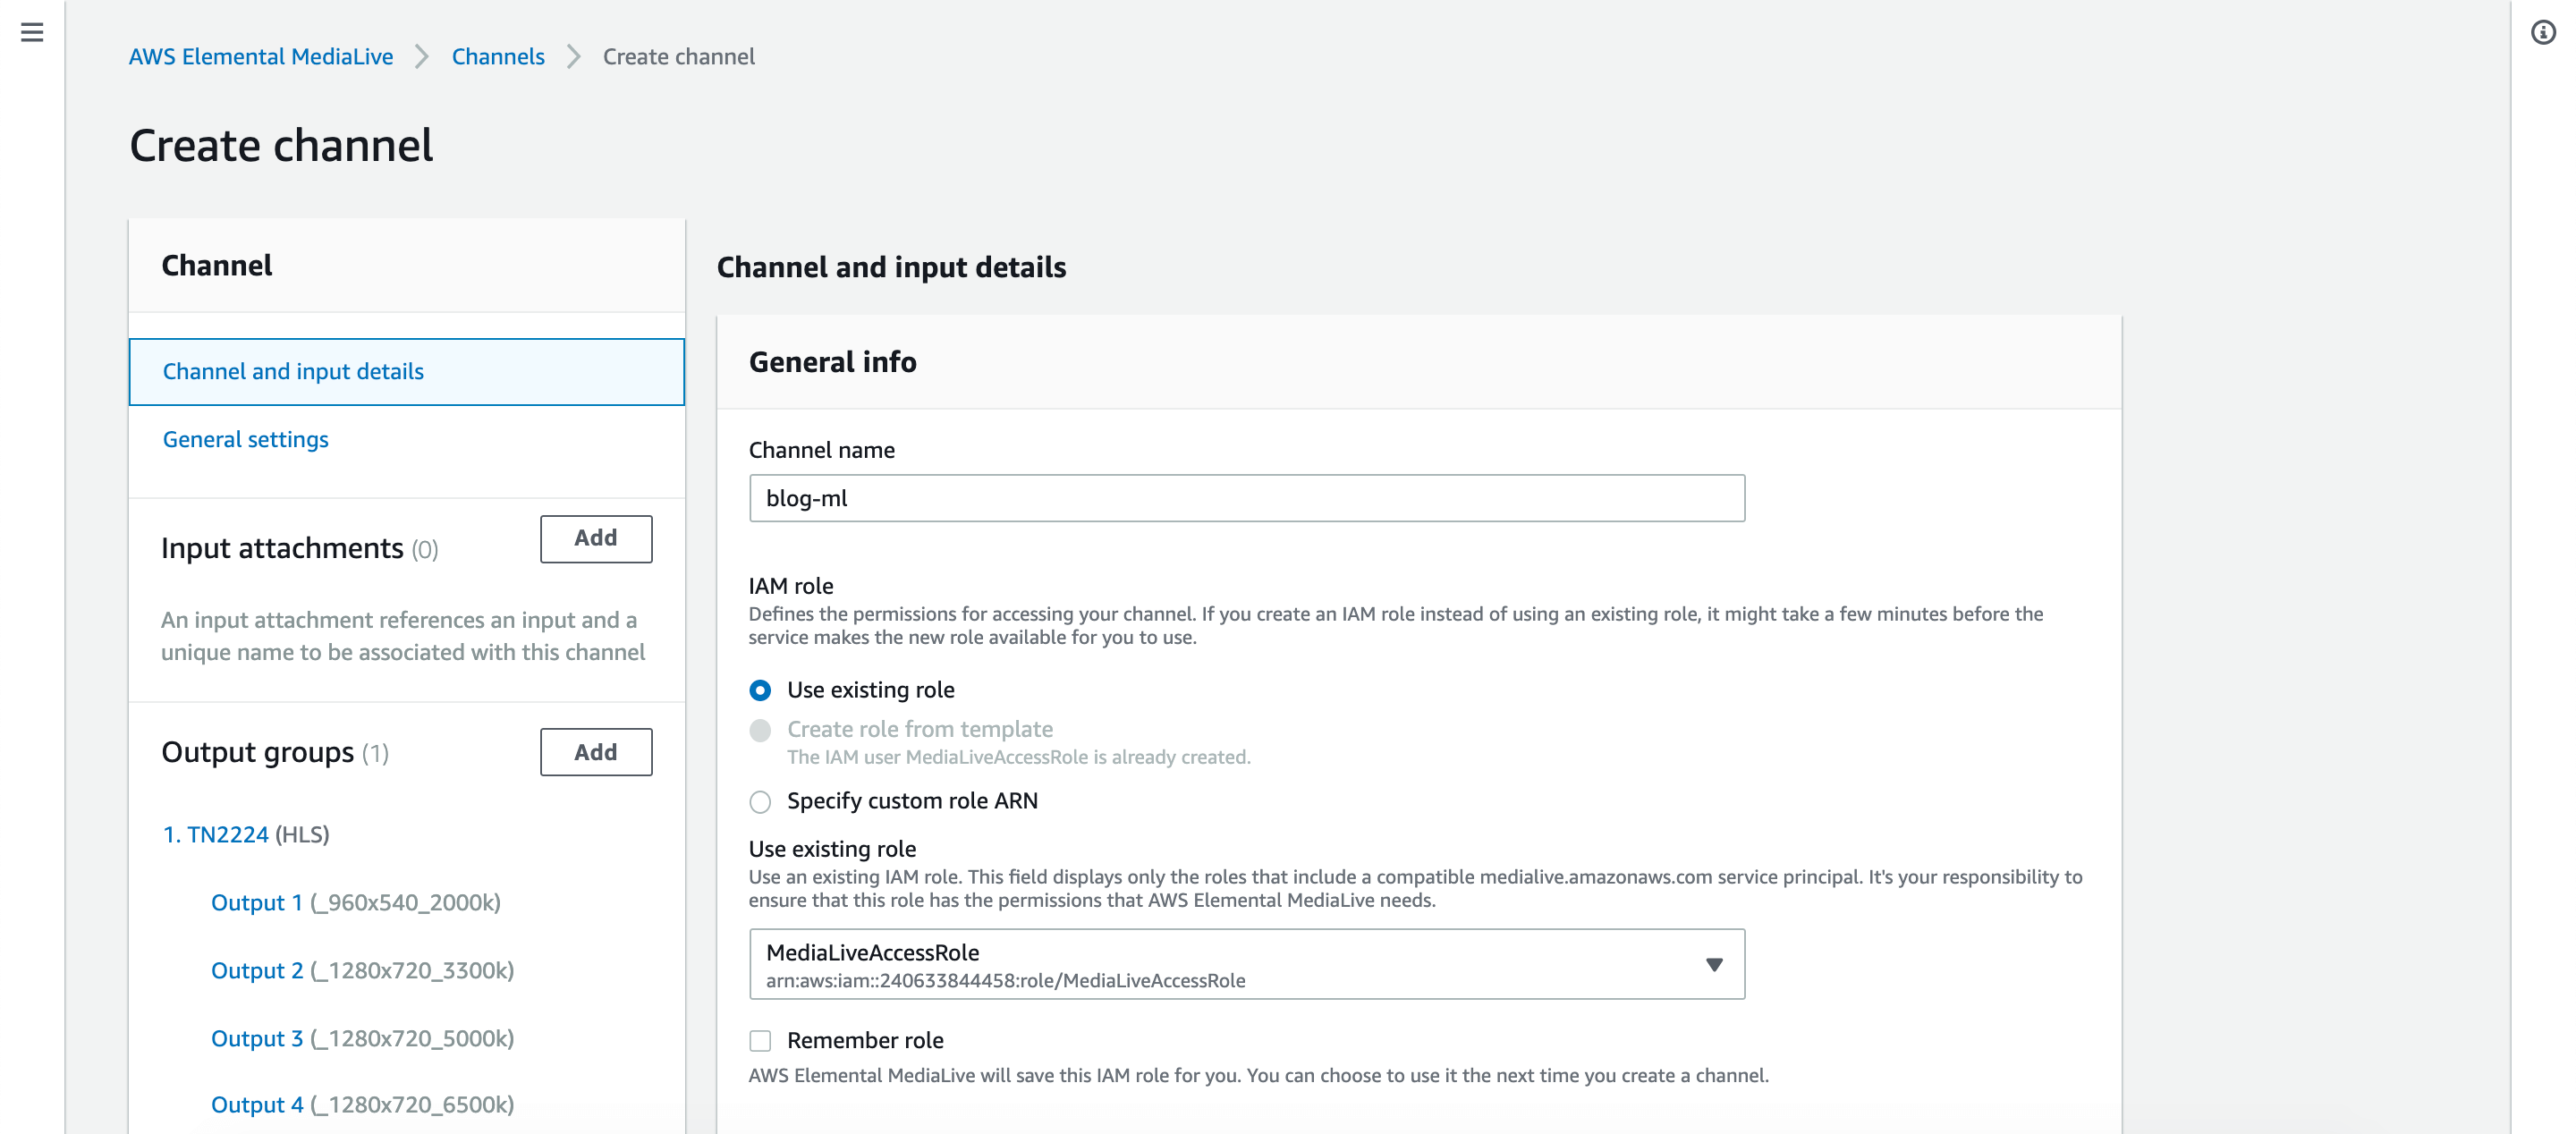
Section: Channel and Input details:
- Give your channel a name
- Select Create role from template for IAM Role and click Create IAM role button
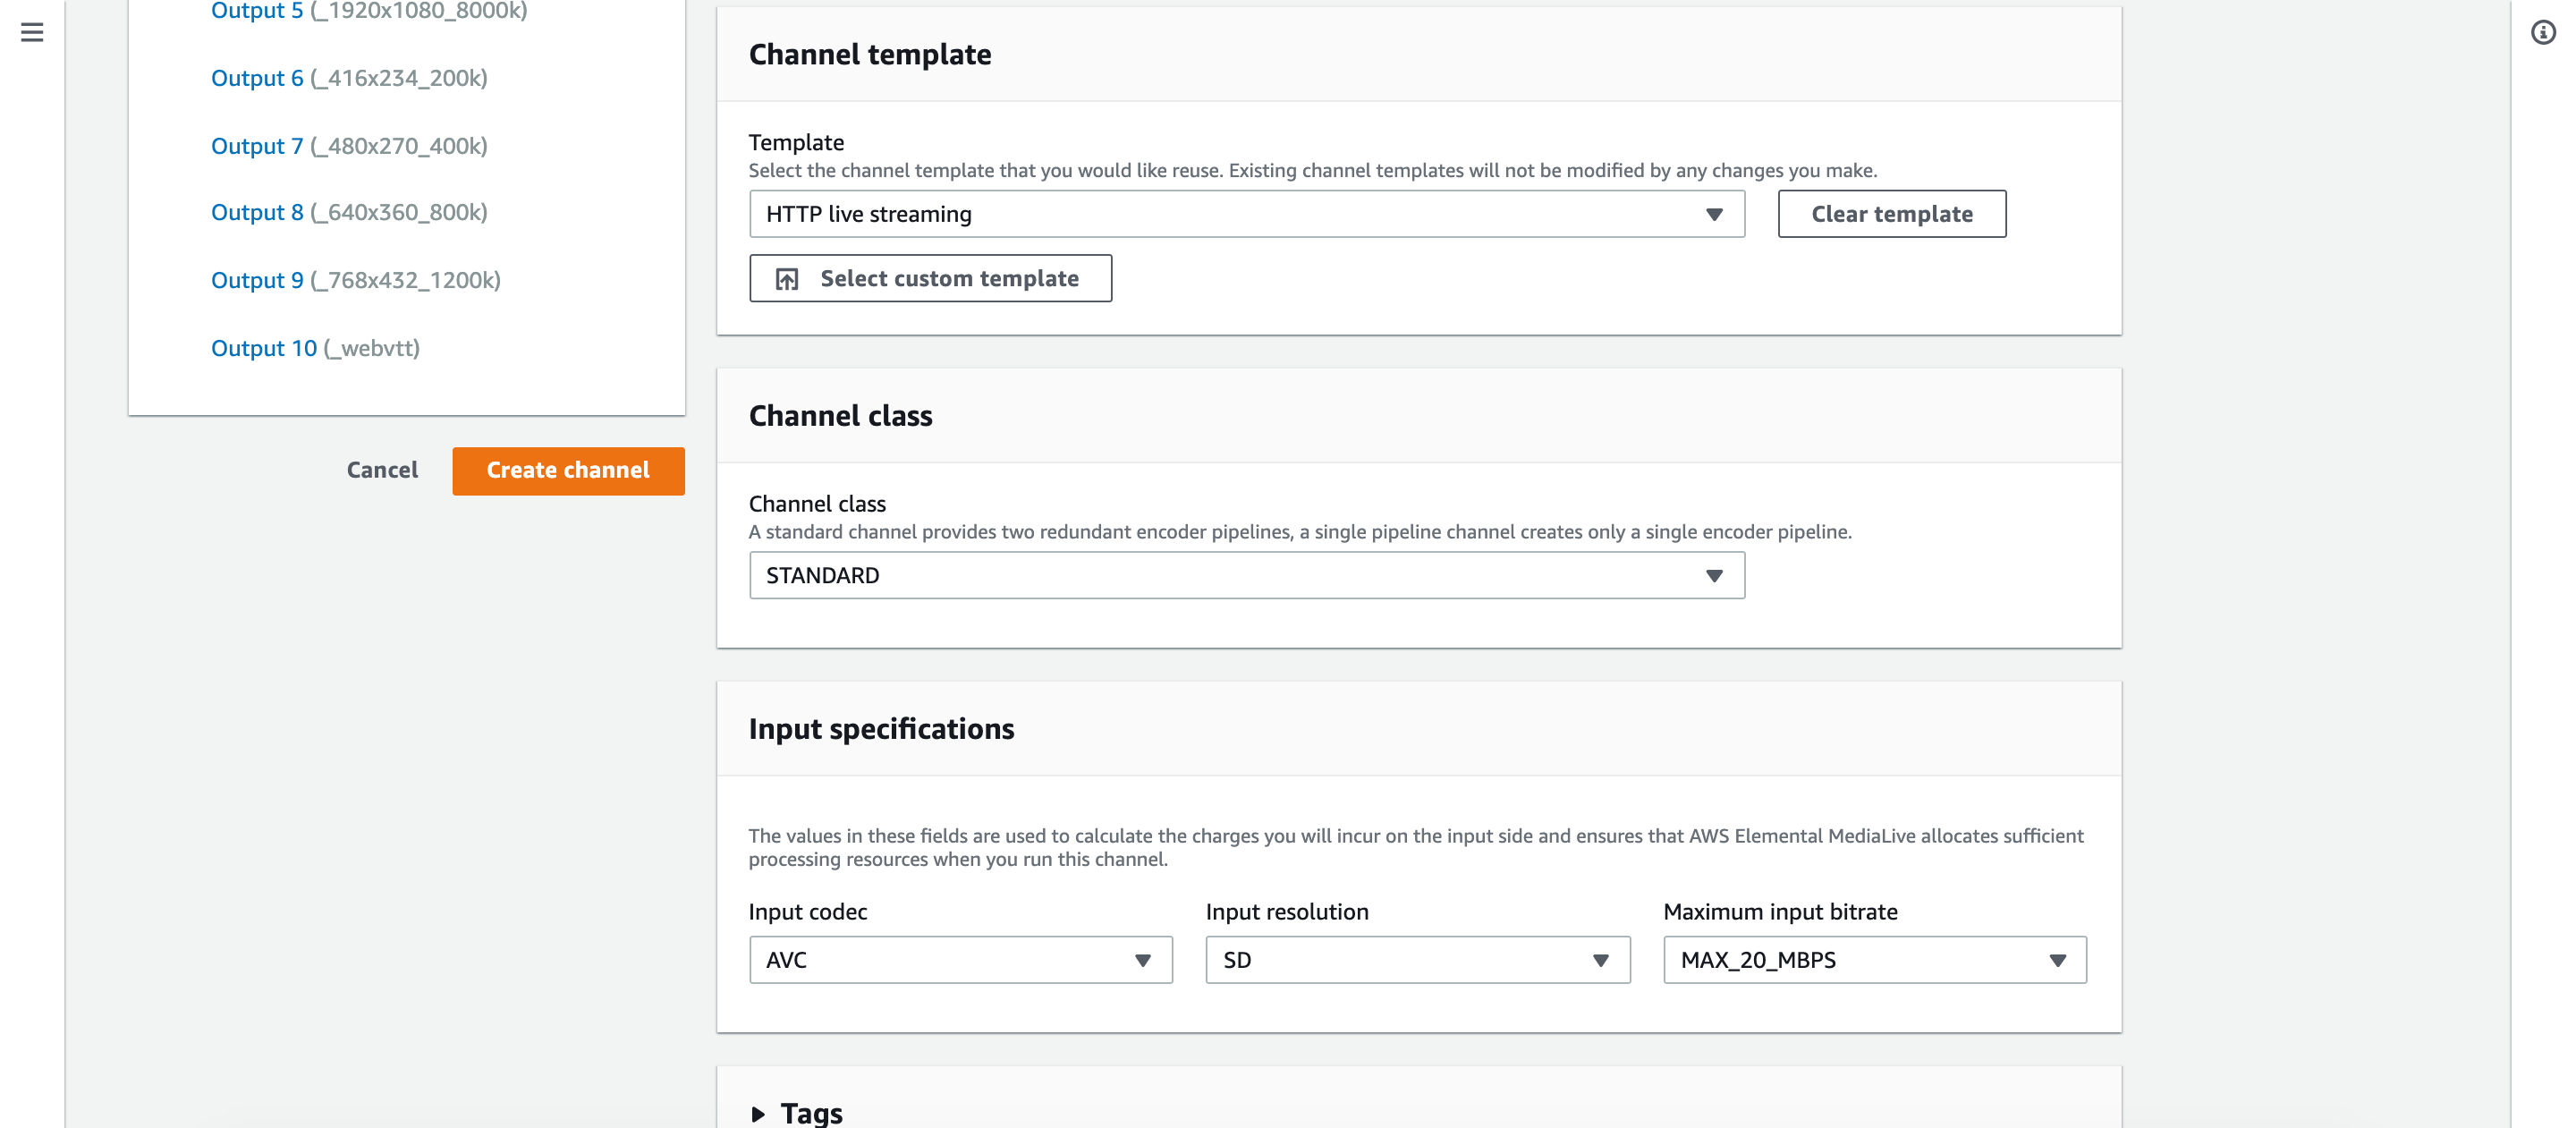
- Under Channel template select HTTP live streaming for HLS
- Last but not the least select SD for Input resolution under Input Specifications section
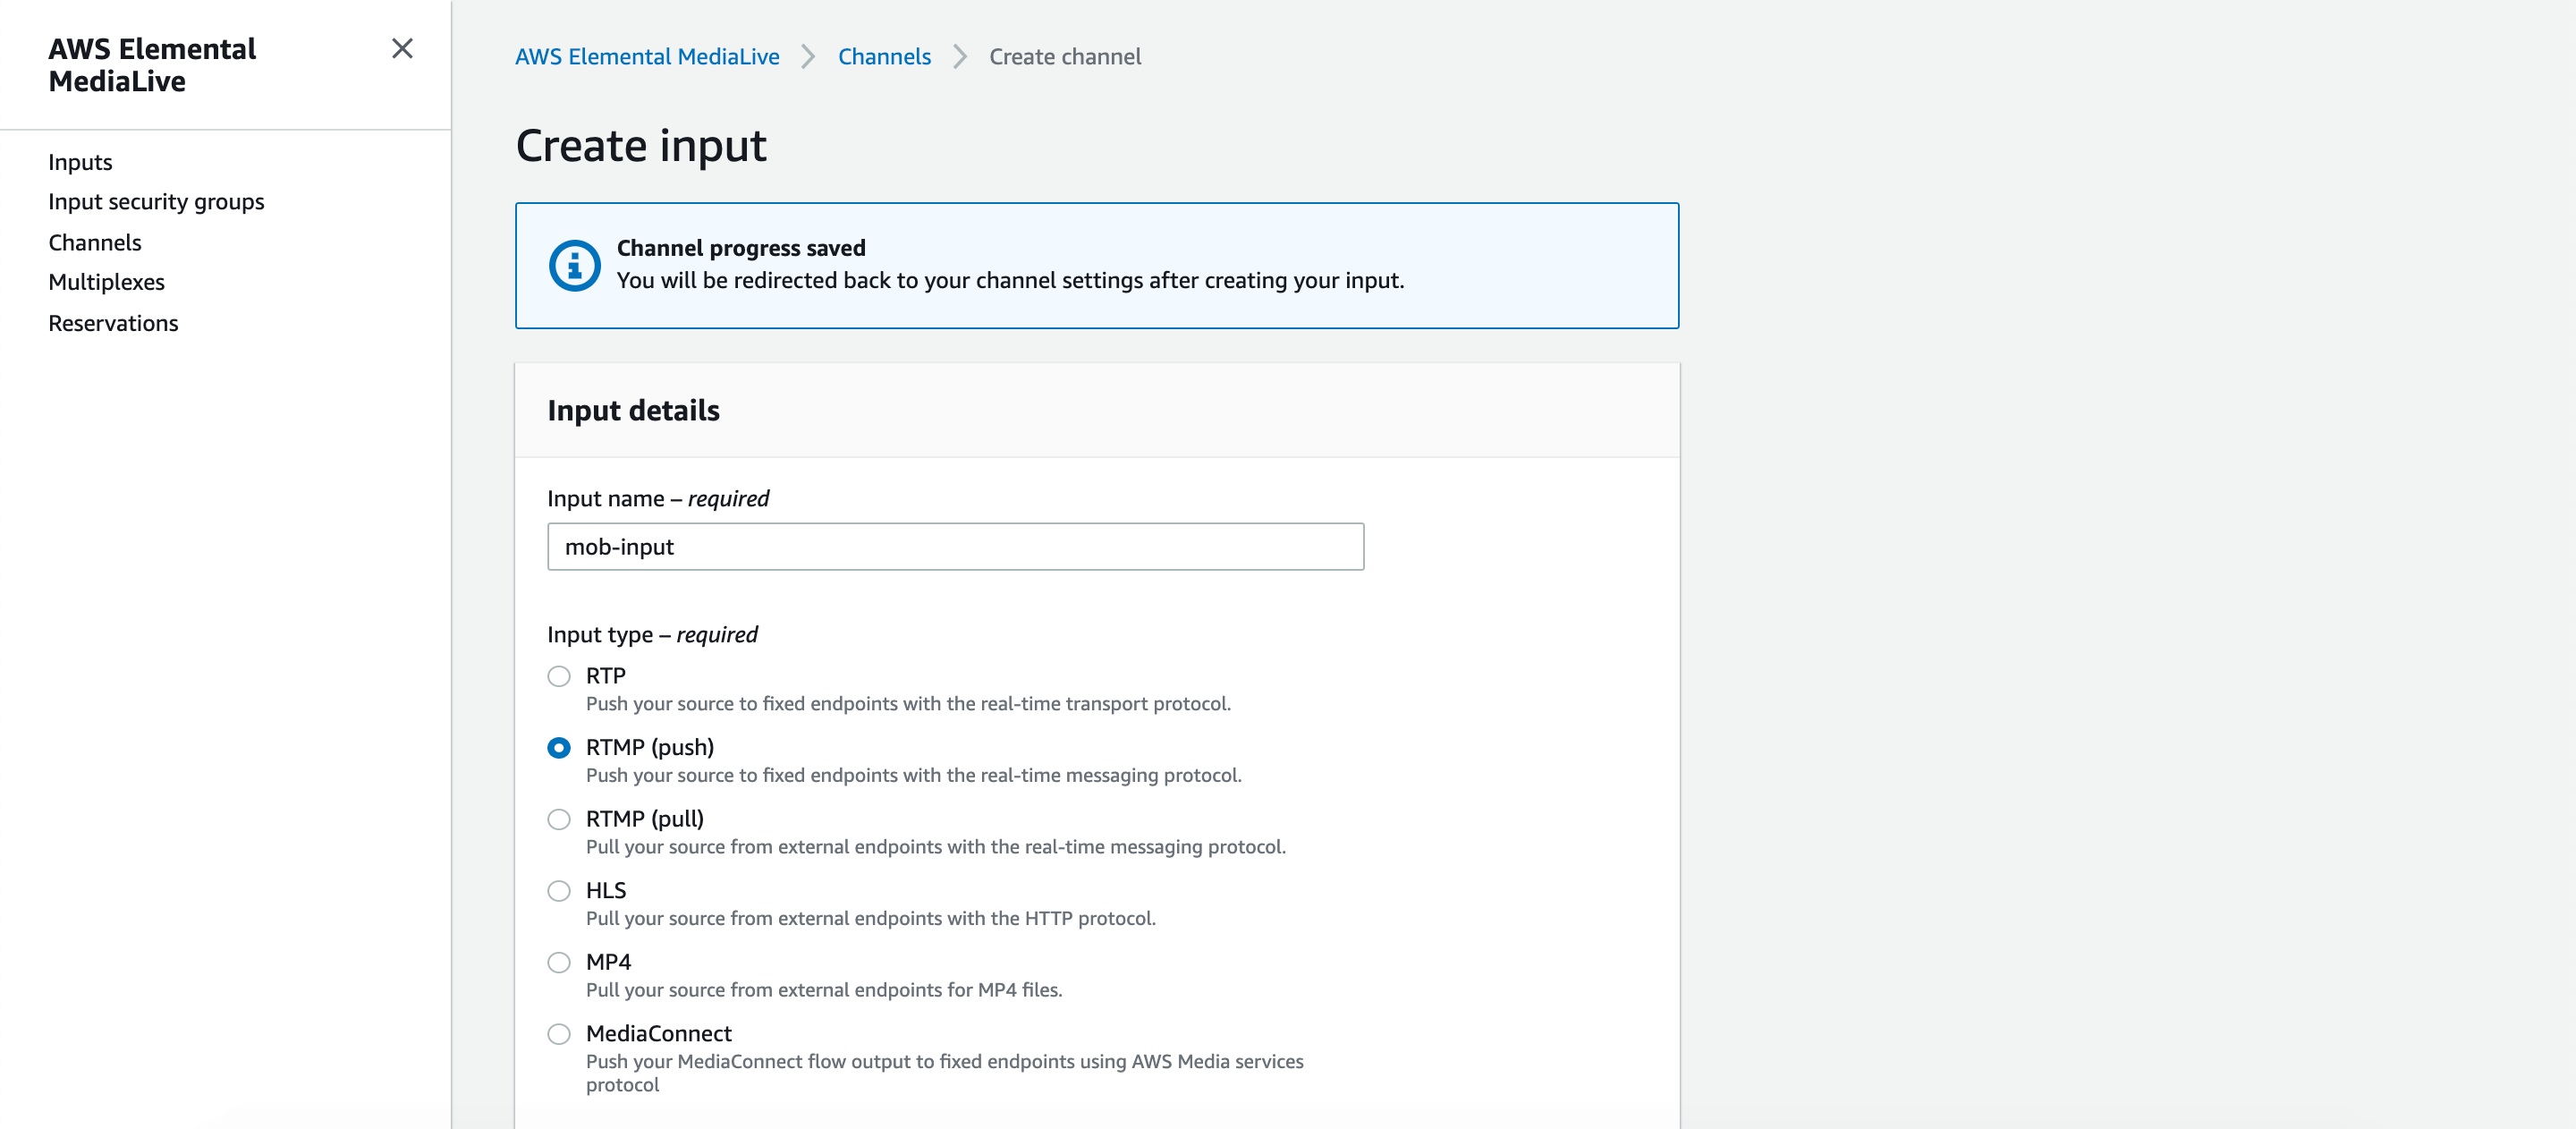
Scroll all the way back to top and in the left panel click on Add for Input attachments followed by Create input button.
Over here we are configuring an input source of our live stream and this is going to be the mobile phone. We will be using our mobile phone for sending live video to AWS MediaLive.
Section: Input attachments:
- Provide a name for your input channel
- Select RTMP (push) for input type
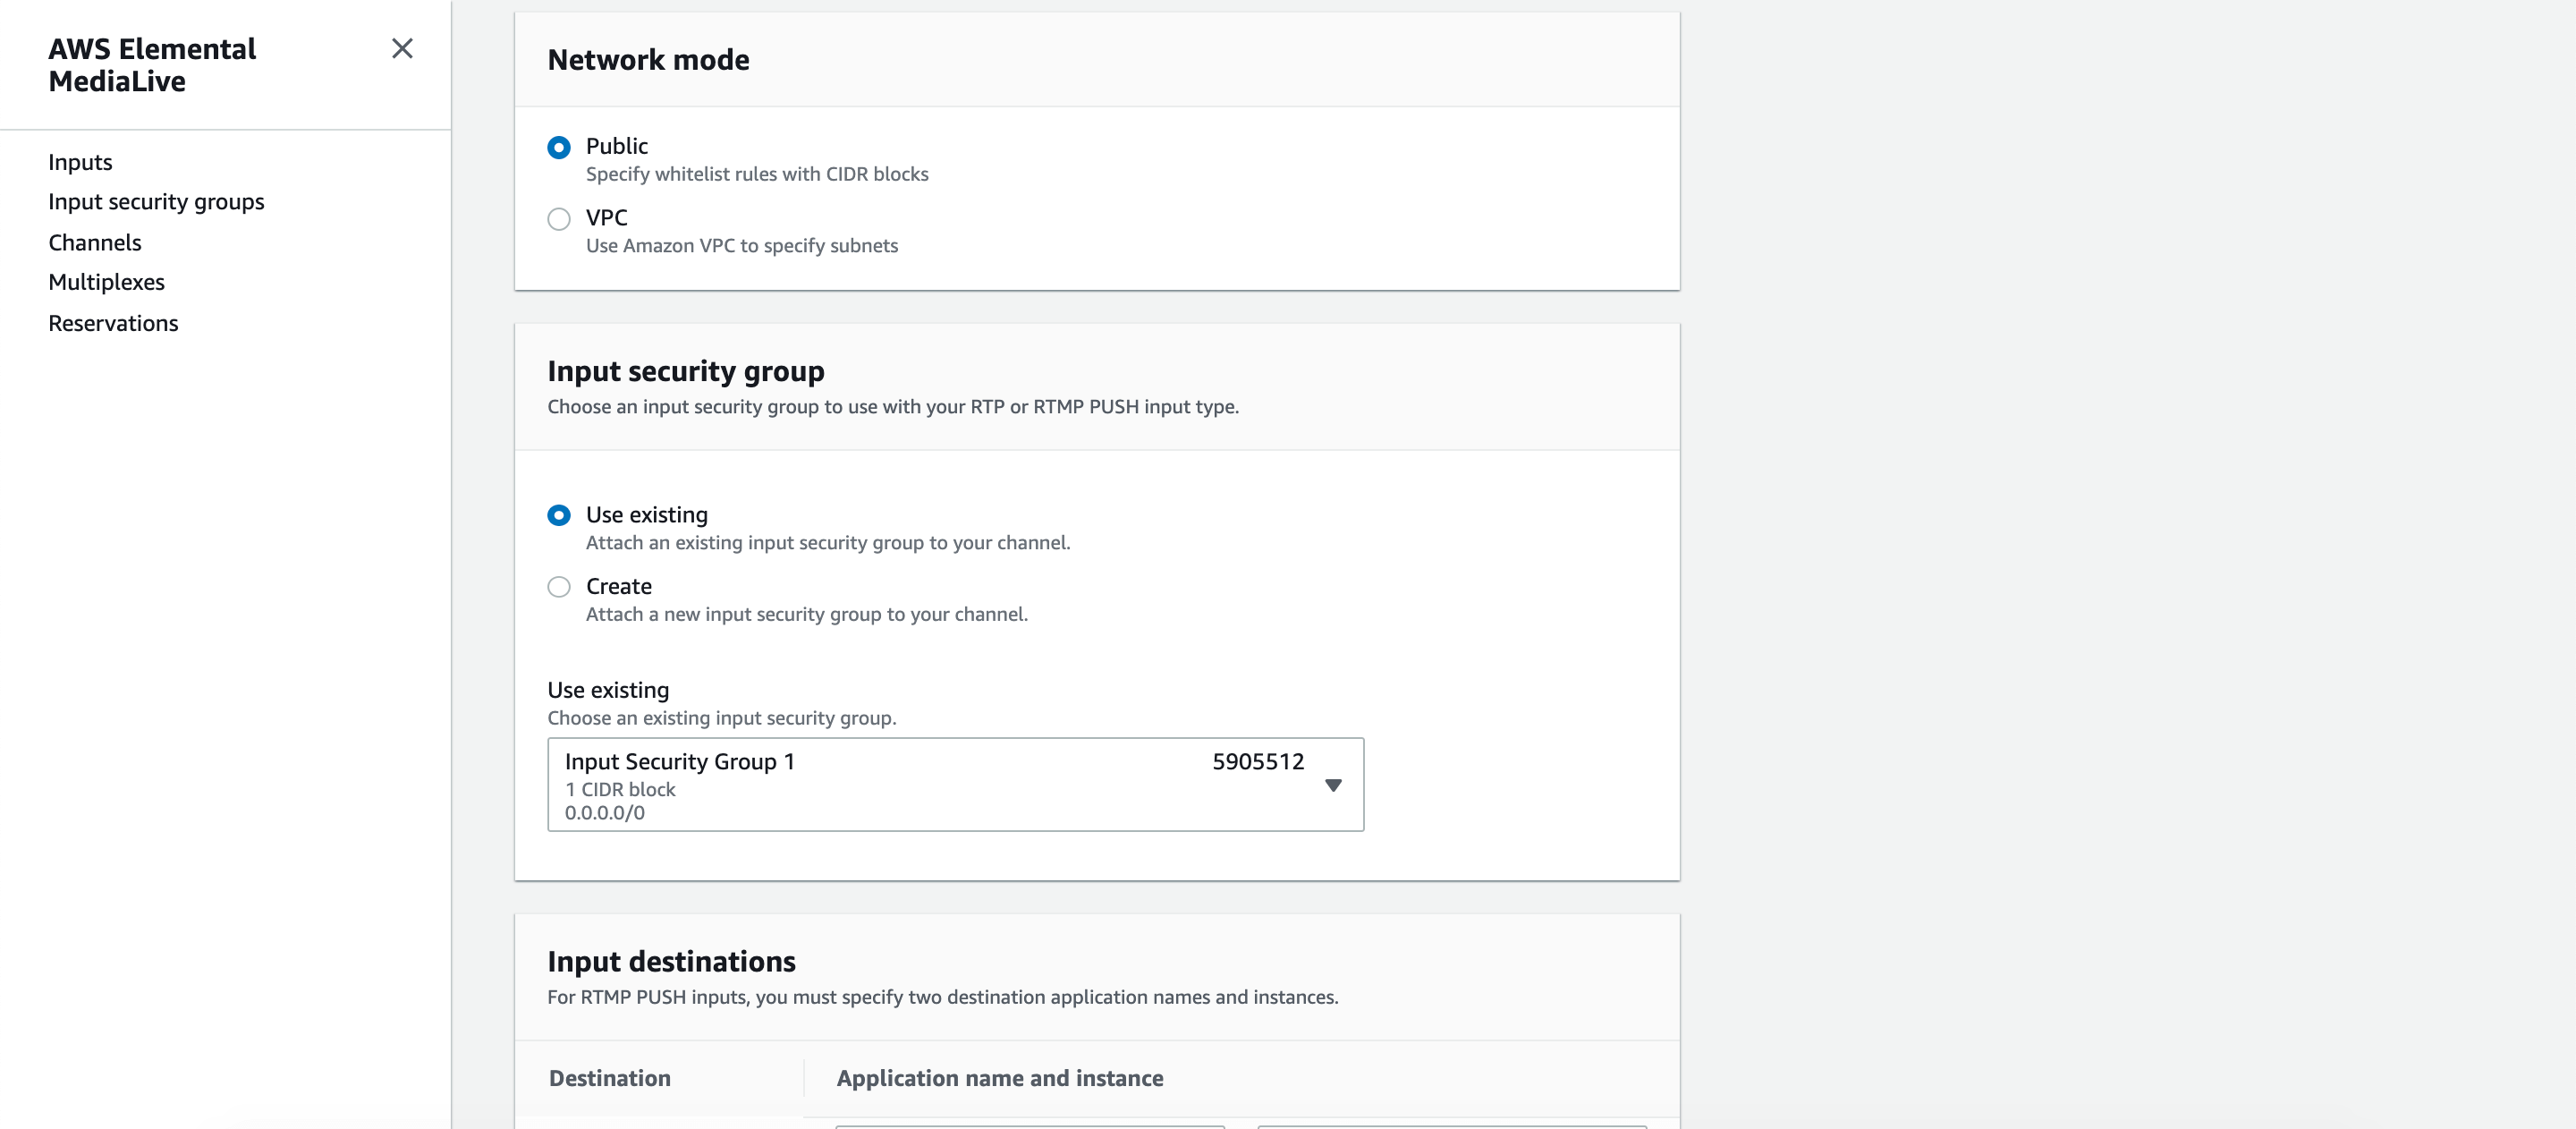
- We will need a public network for sending video via our phone.
- We will create a new security group with 0.0.0.0/0 as our CIDR block. This allows traffic from anywhere in the world.
- Finally, provide application and instance name so that the public facing input endpoints can be associated with them.
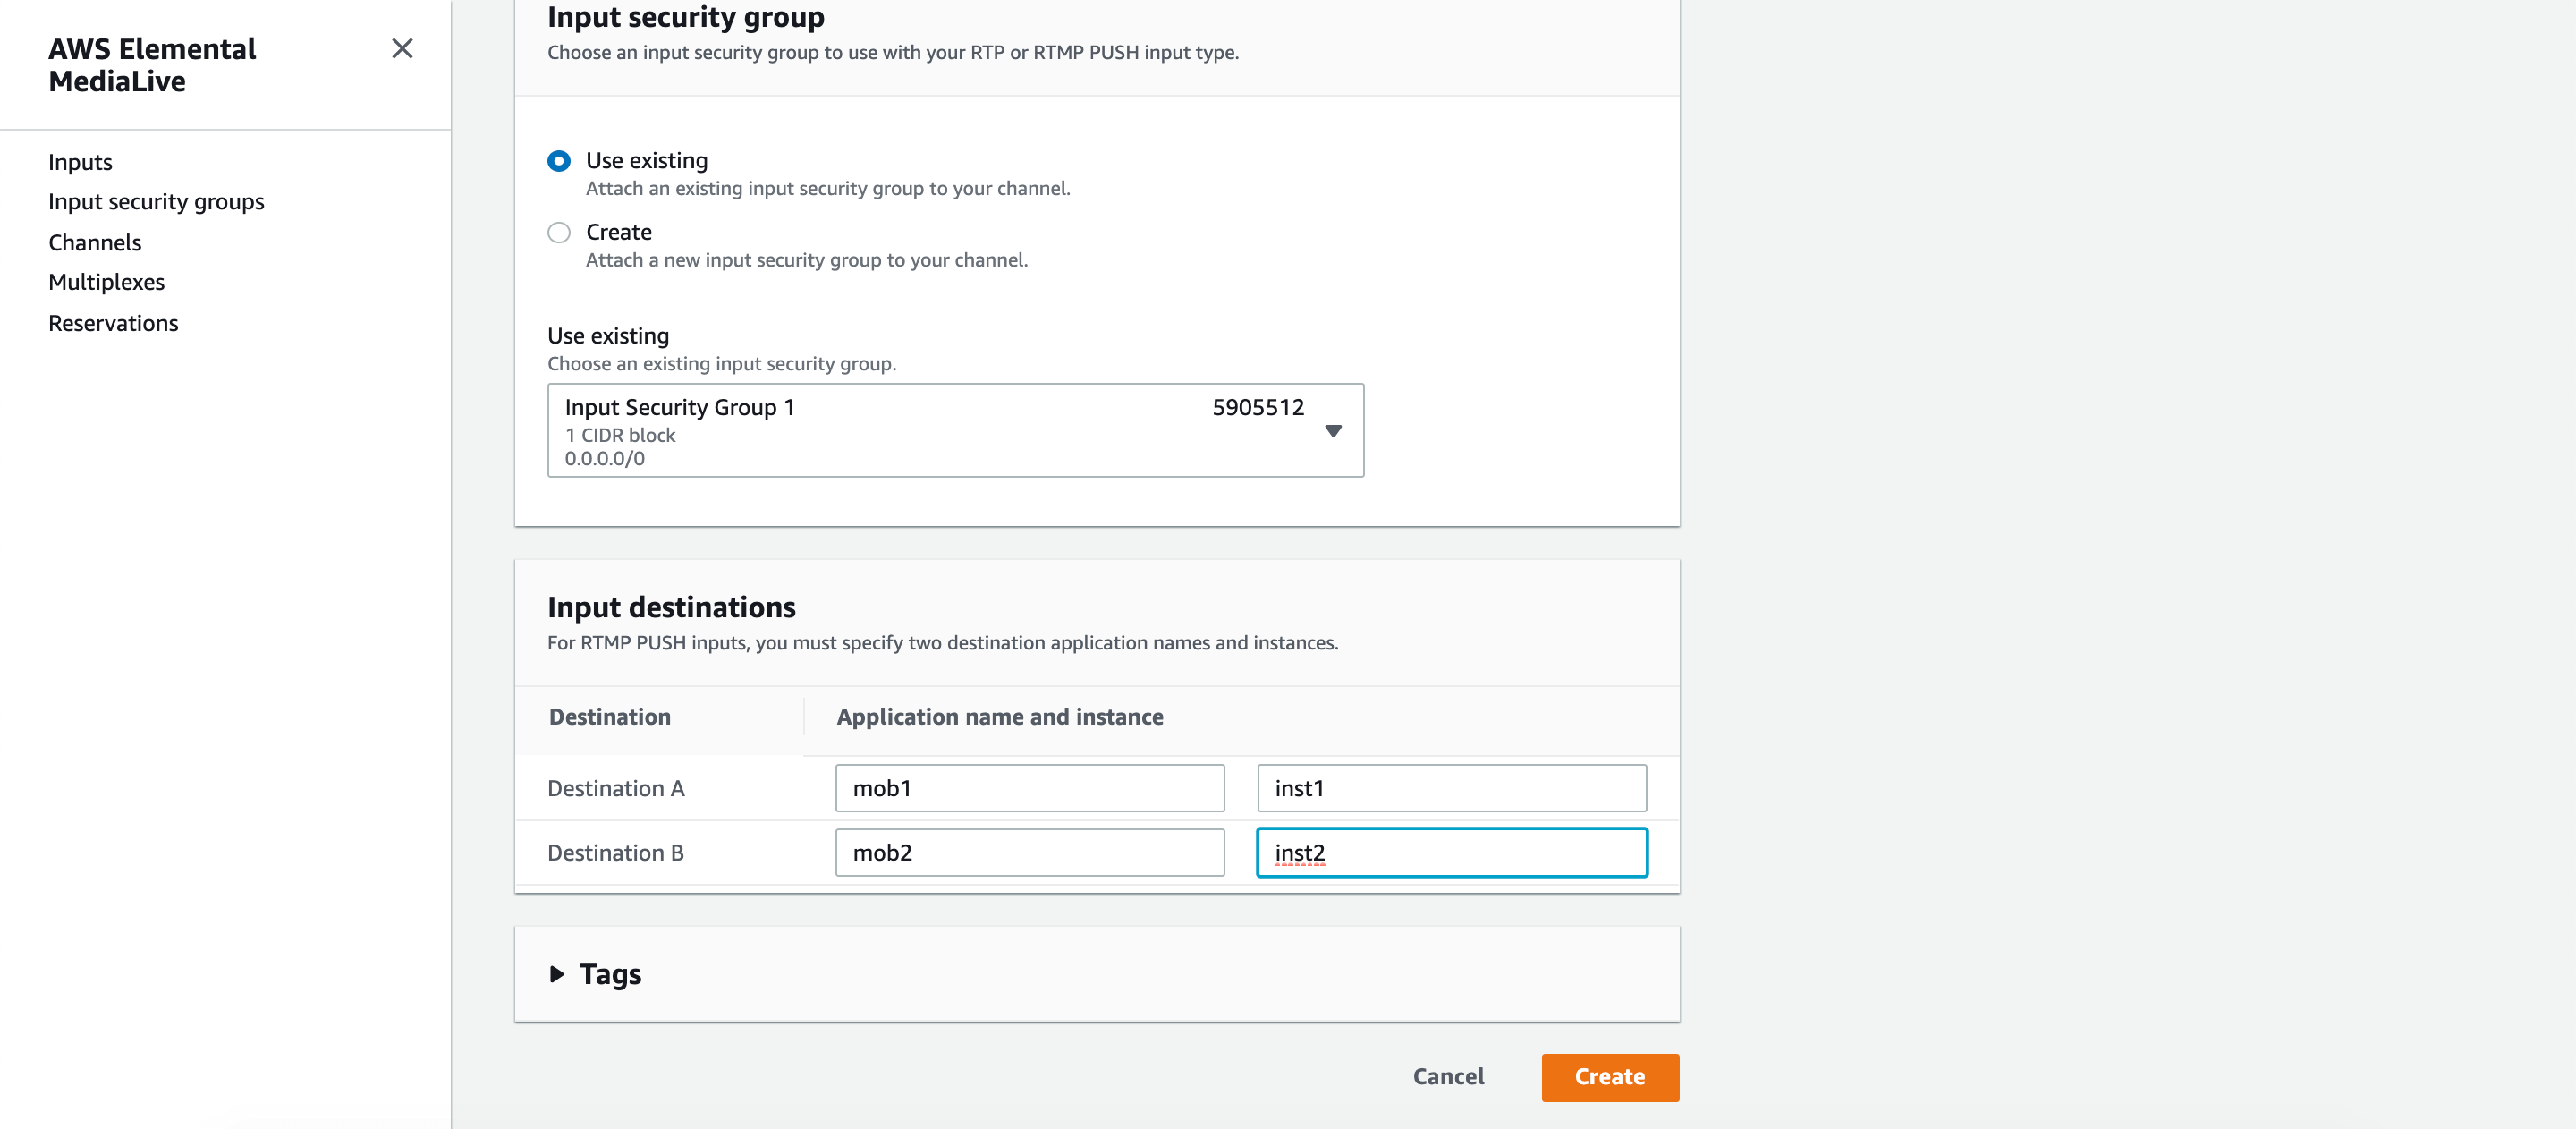
After the input has been created, select the same from the dropdown. Make sure you copy the input destinations as you will require them at later stage to configure your mobile application for sending live video streams. Once you have copied the data at a safe place please click Confirm button.

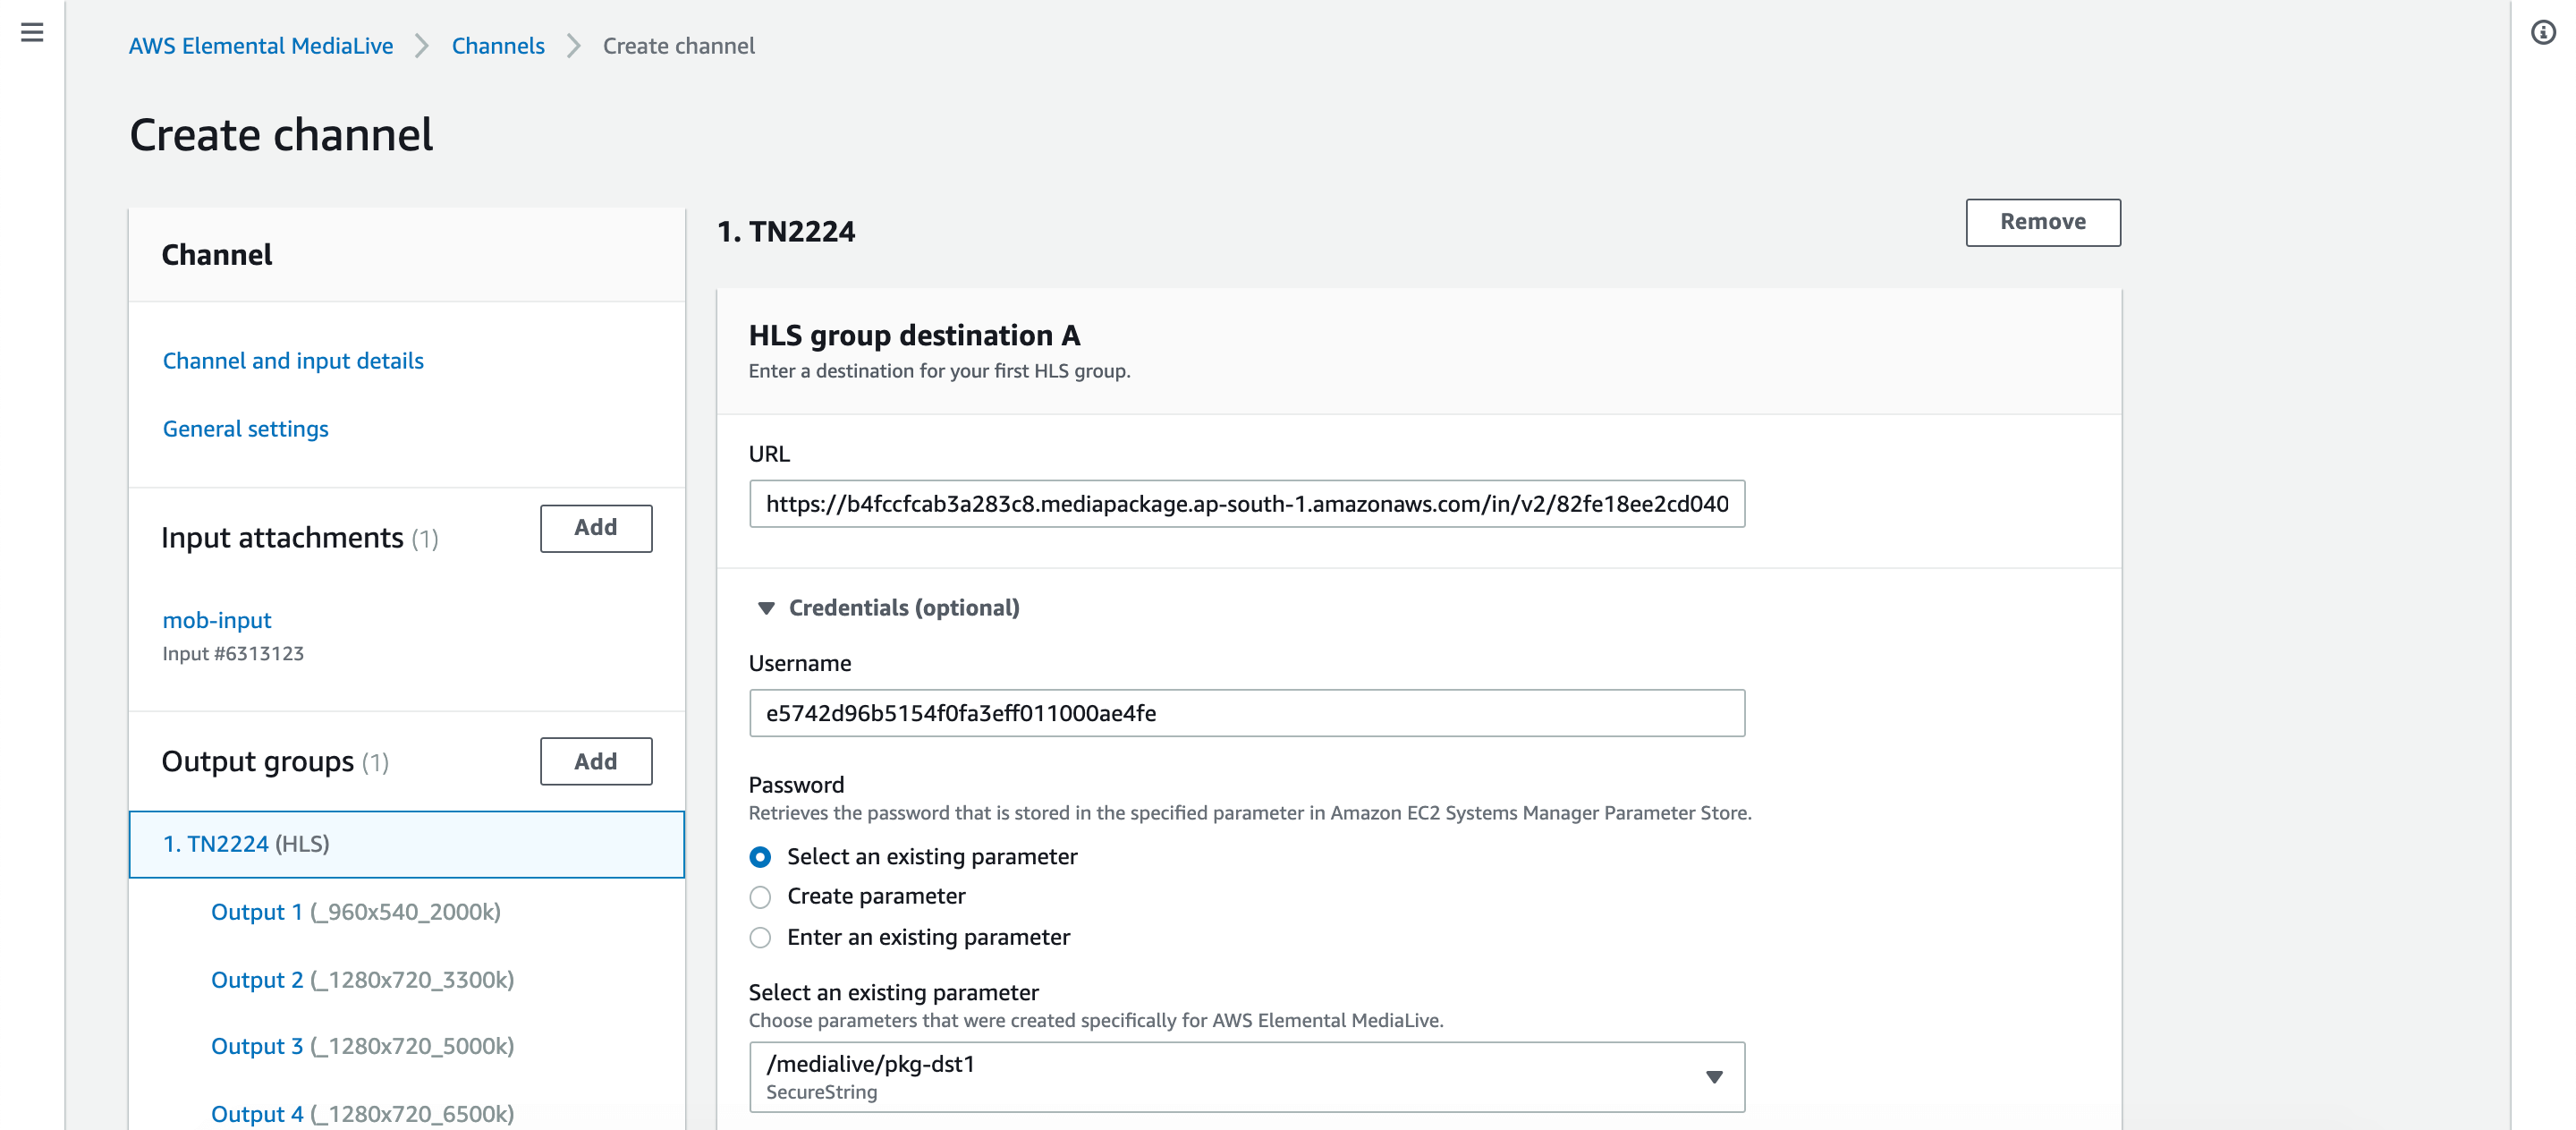
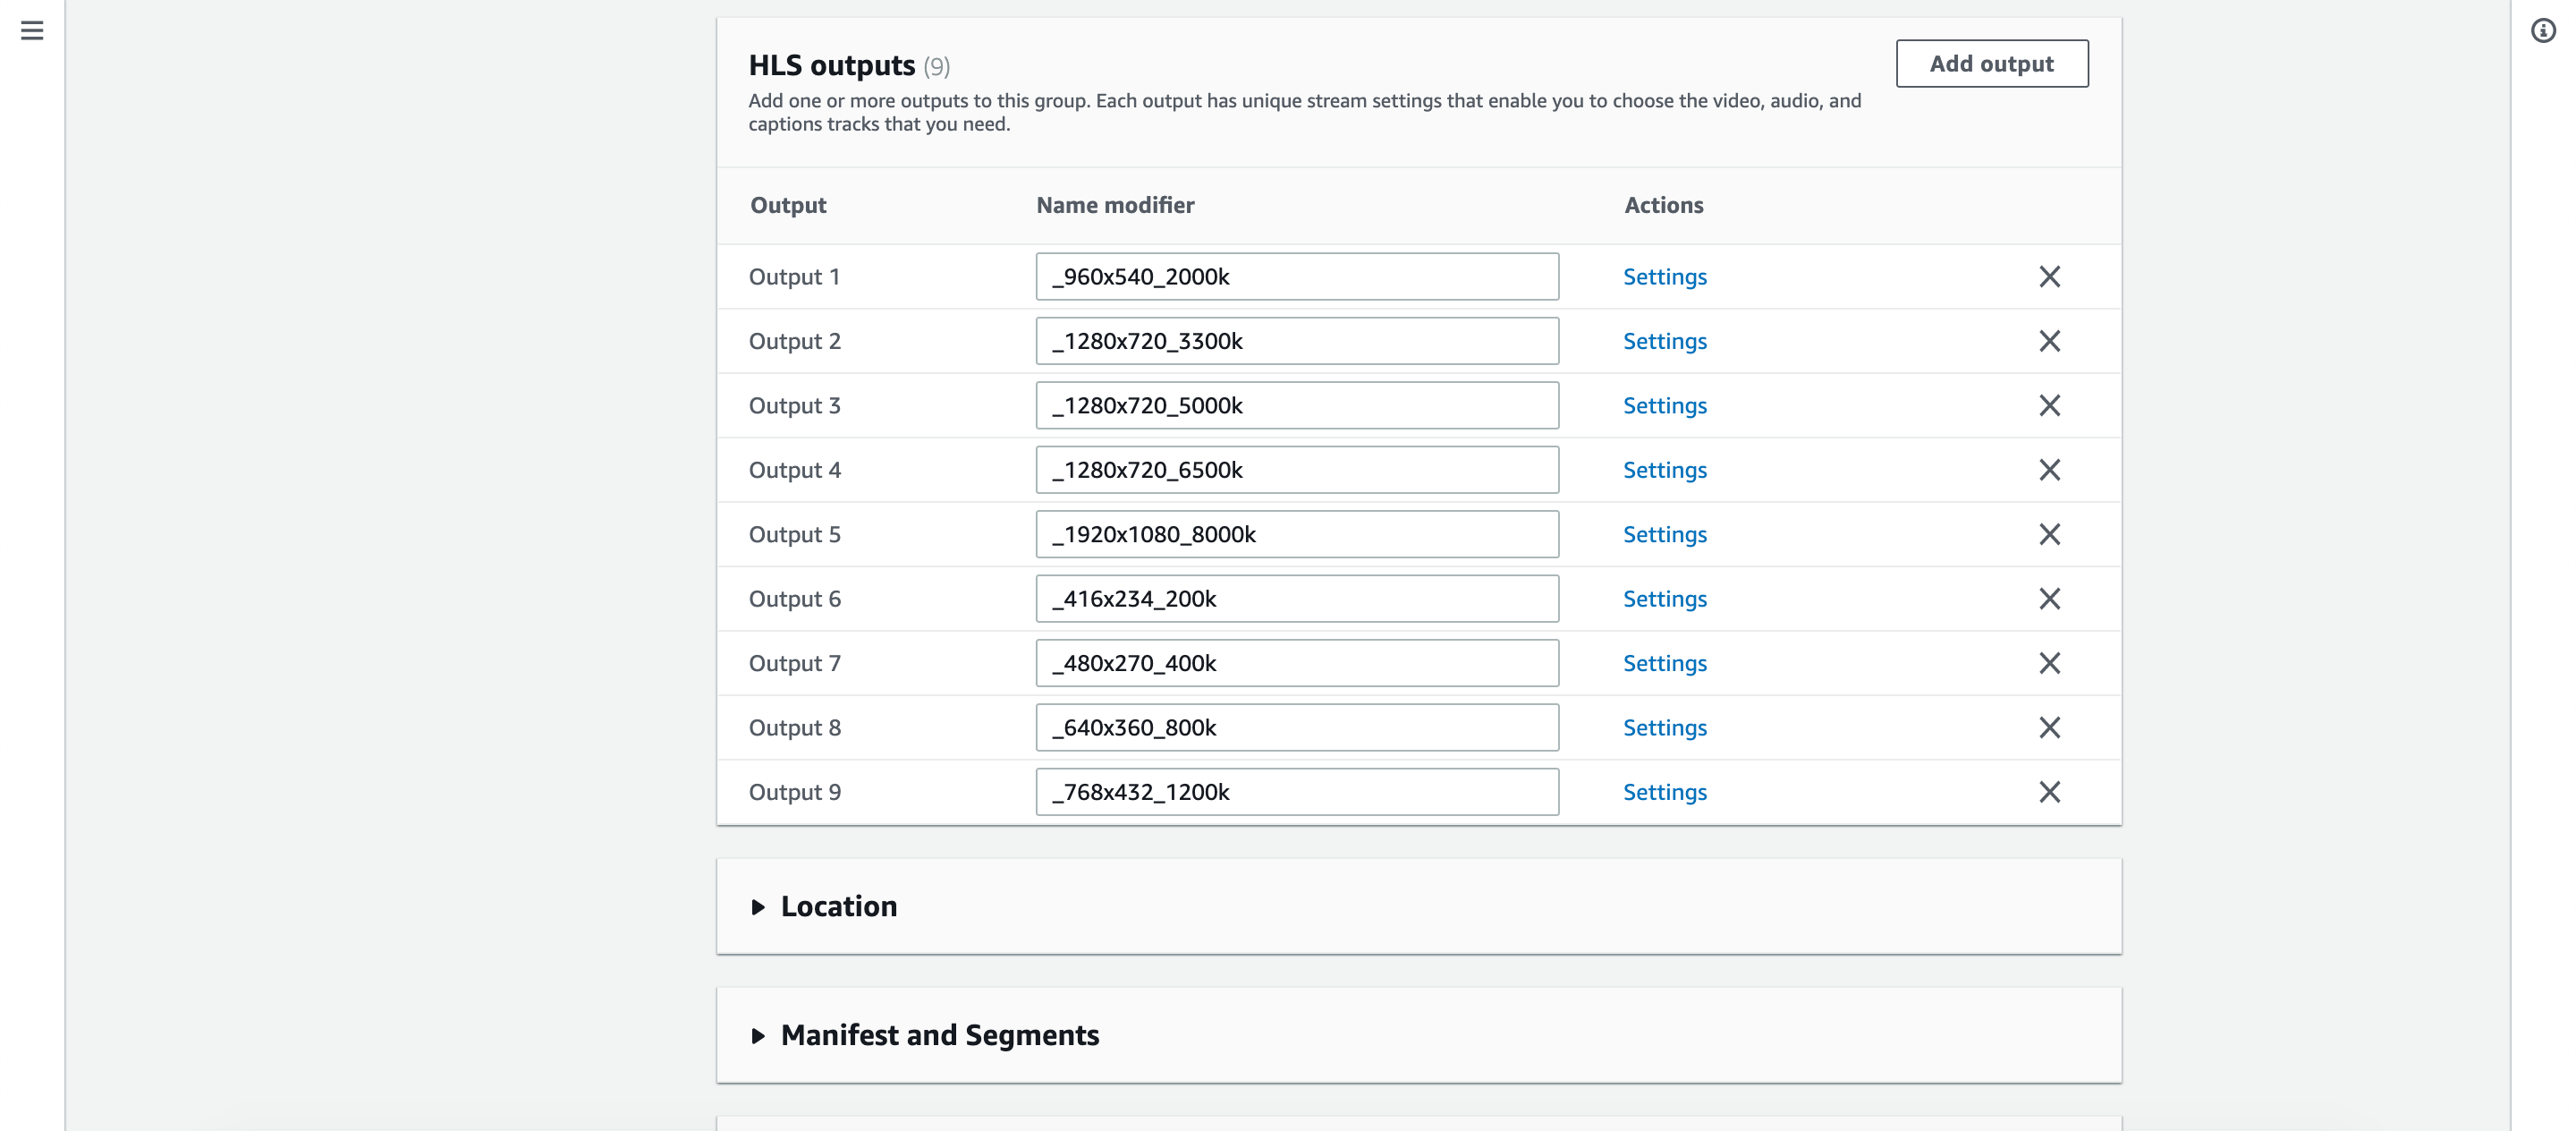
It's now time to configure the Output Groups. Based on the HTTP live streaming template we selected earlier AWS pre-populates Output Groups. In your left panel click on the first output group to get started.
The first thing to configure is destination where the stream needs to be forwarded after compression. This is going to be AWS MediaPackage so let's switch to MediaPackage tab and grab the required configuration.
MediaPackage provides two input URLs along with credentials required to setup HLS group destination in MediaLive.
Section: Output Groups:
- Copy the first URL and paste it under destination A URL.
- Expand credentials section and paste username from MediaPackage service for the respective URL.
- To provide the password securely we are required to create a SSM parameter hence, provide parameter name and password to create one.
- Repeat the same for destination group B.
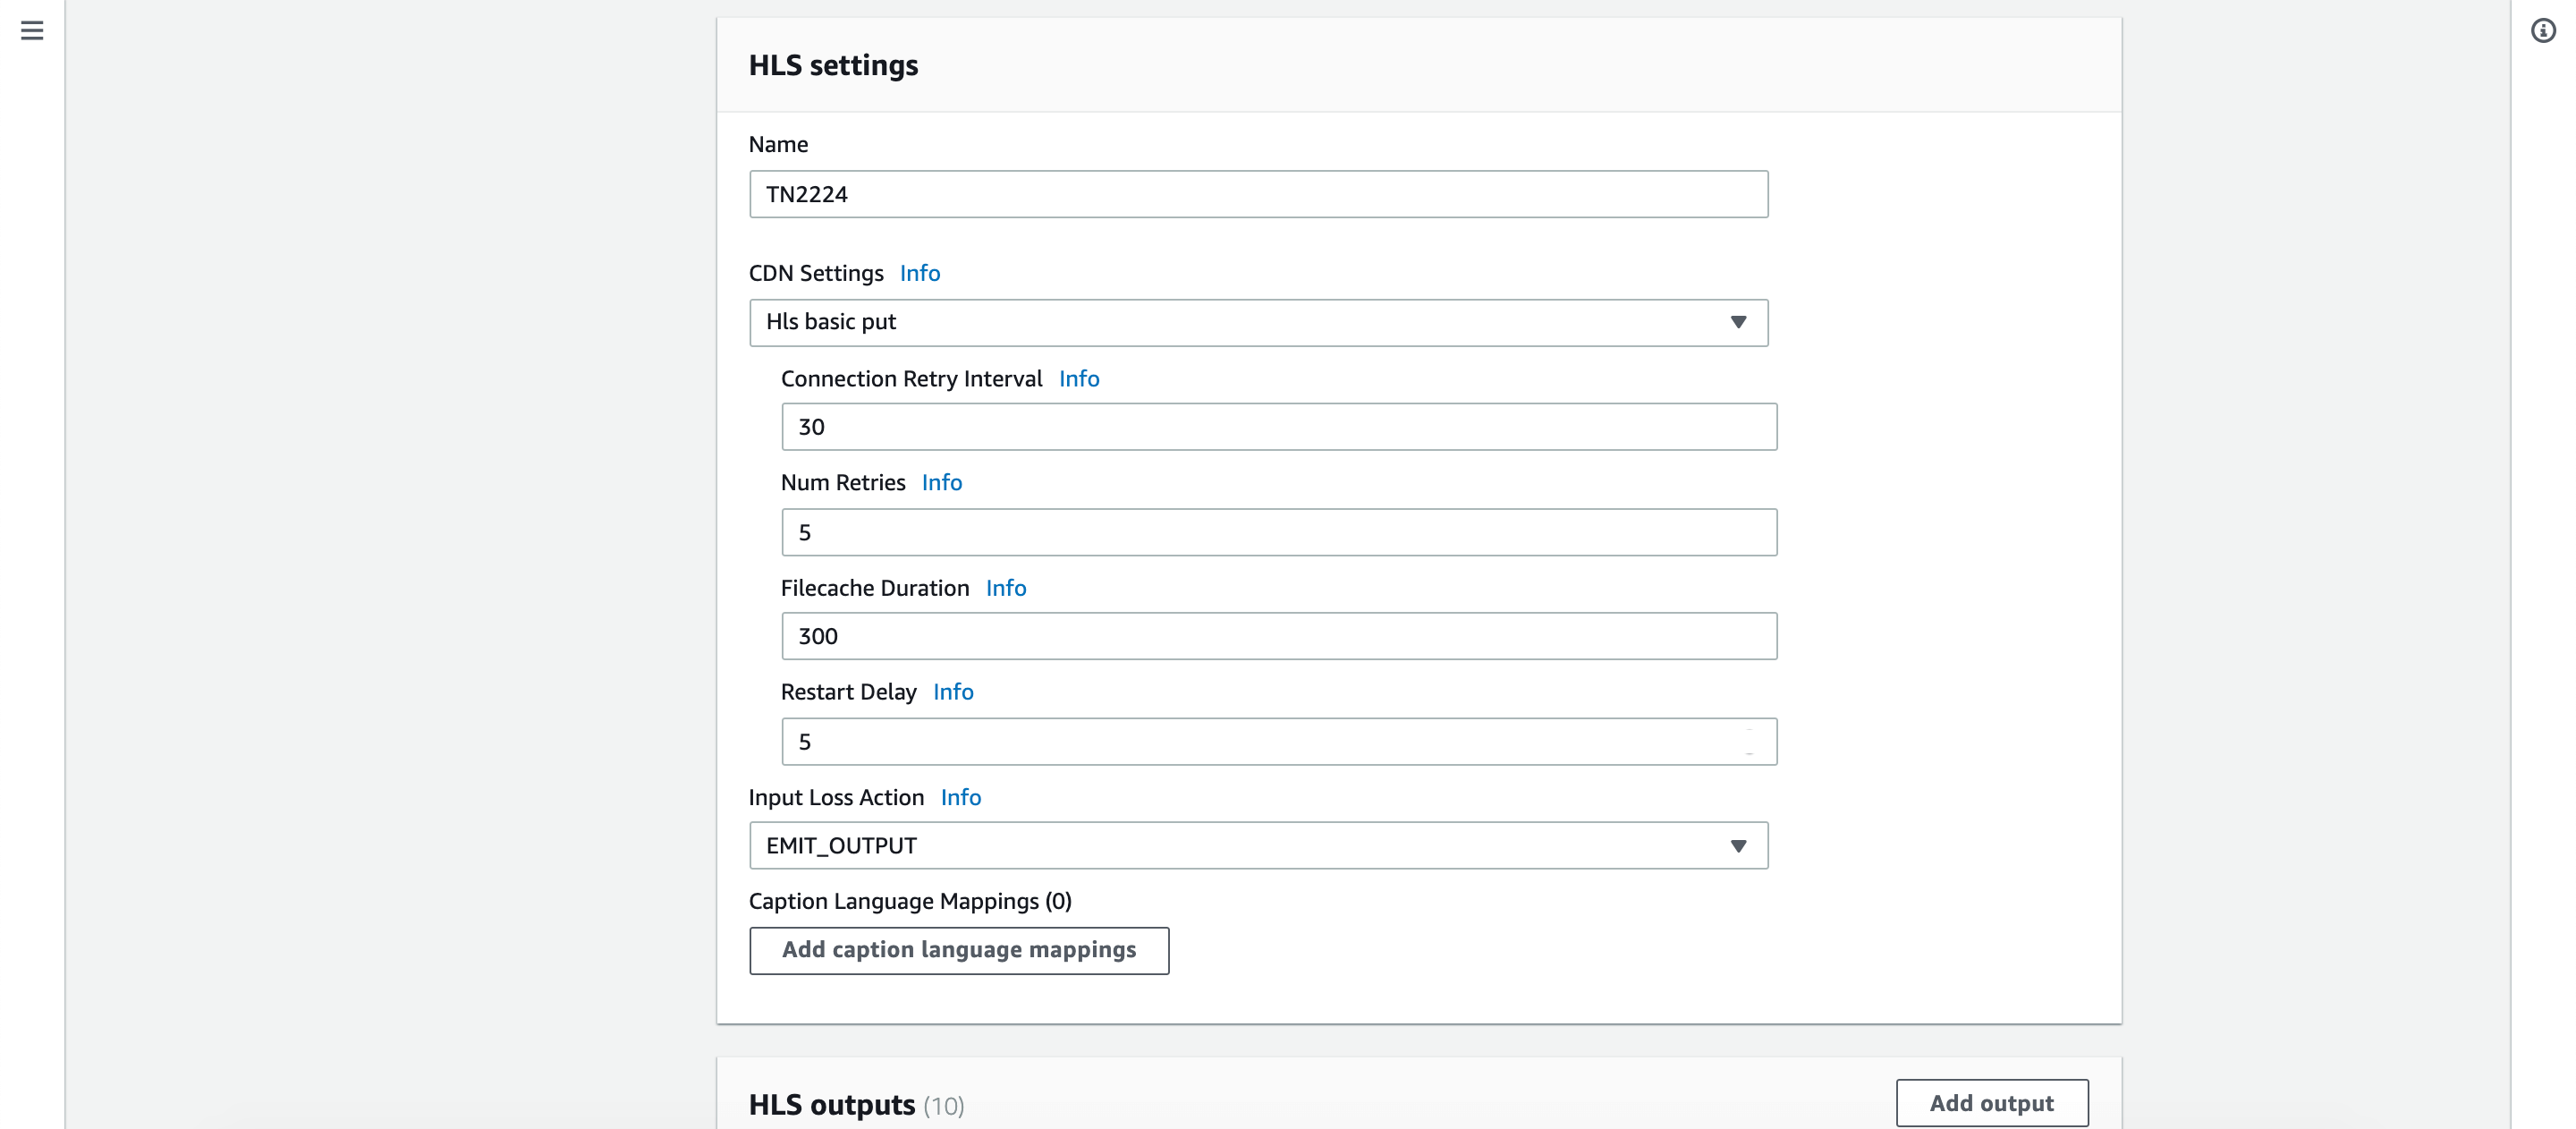
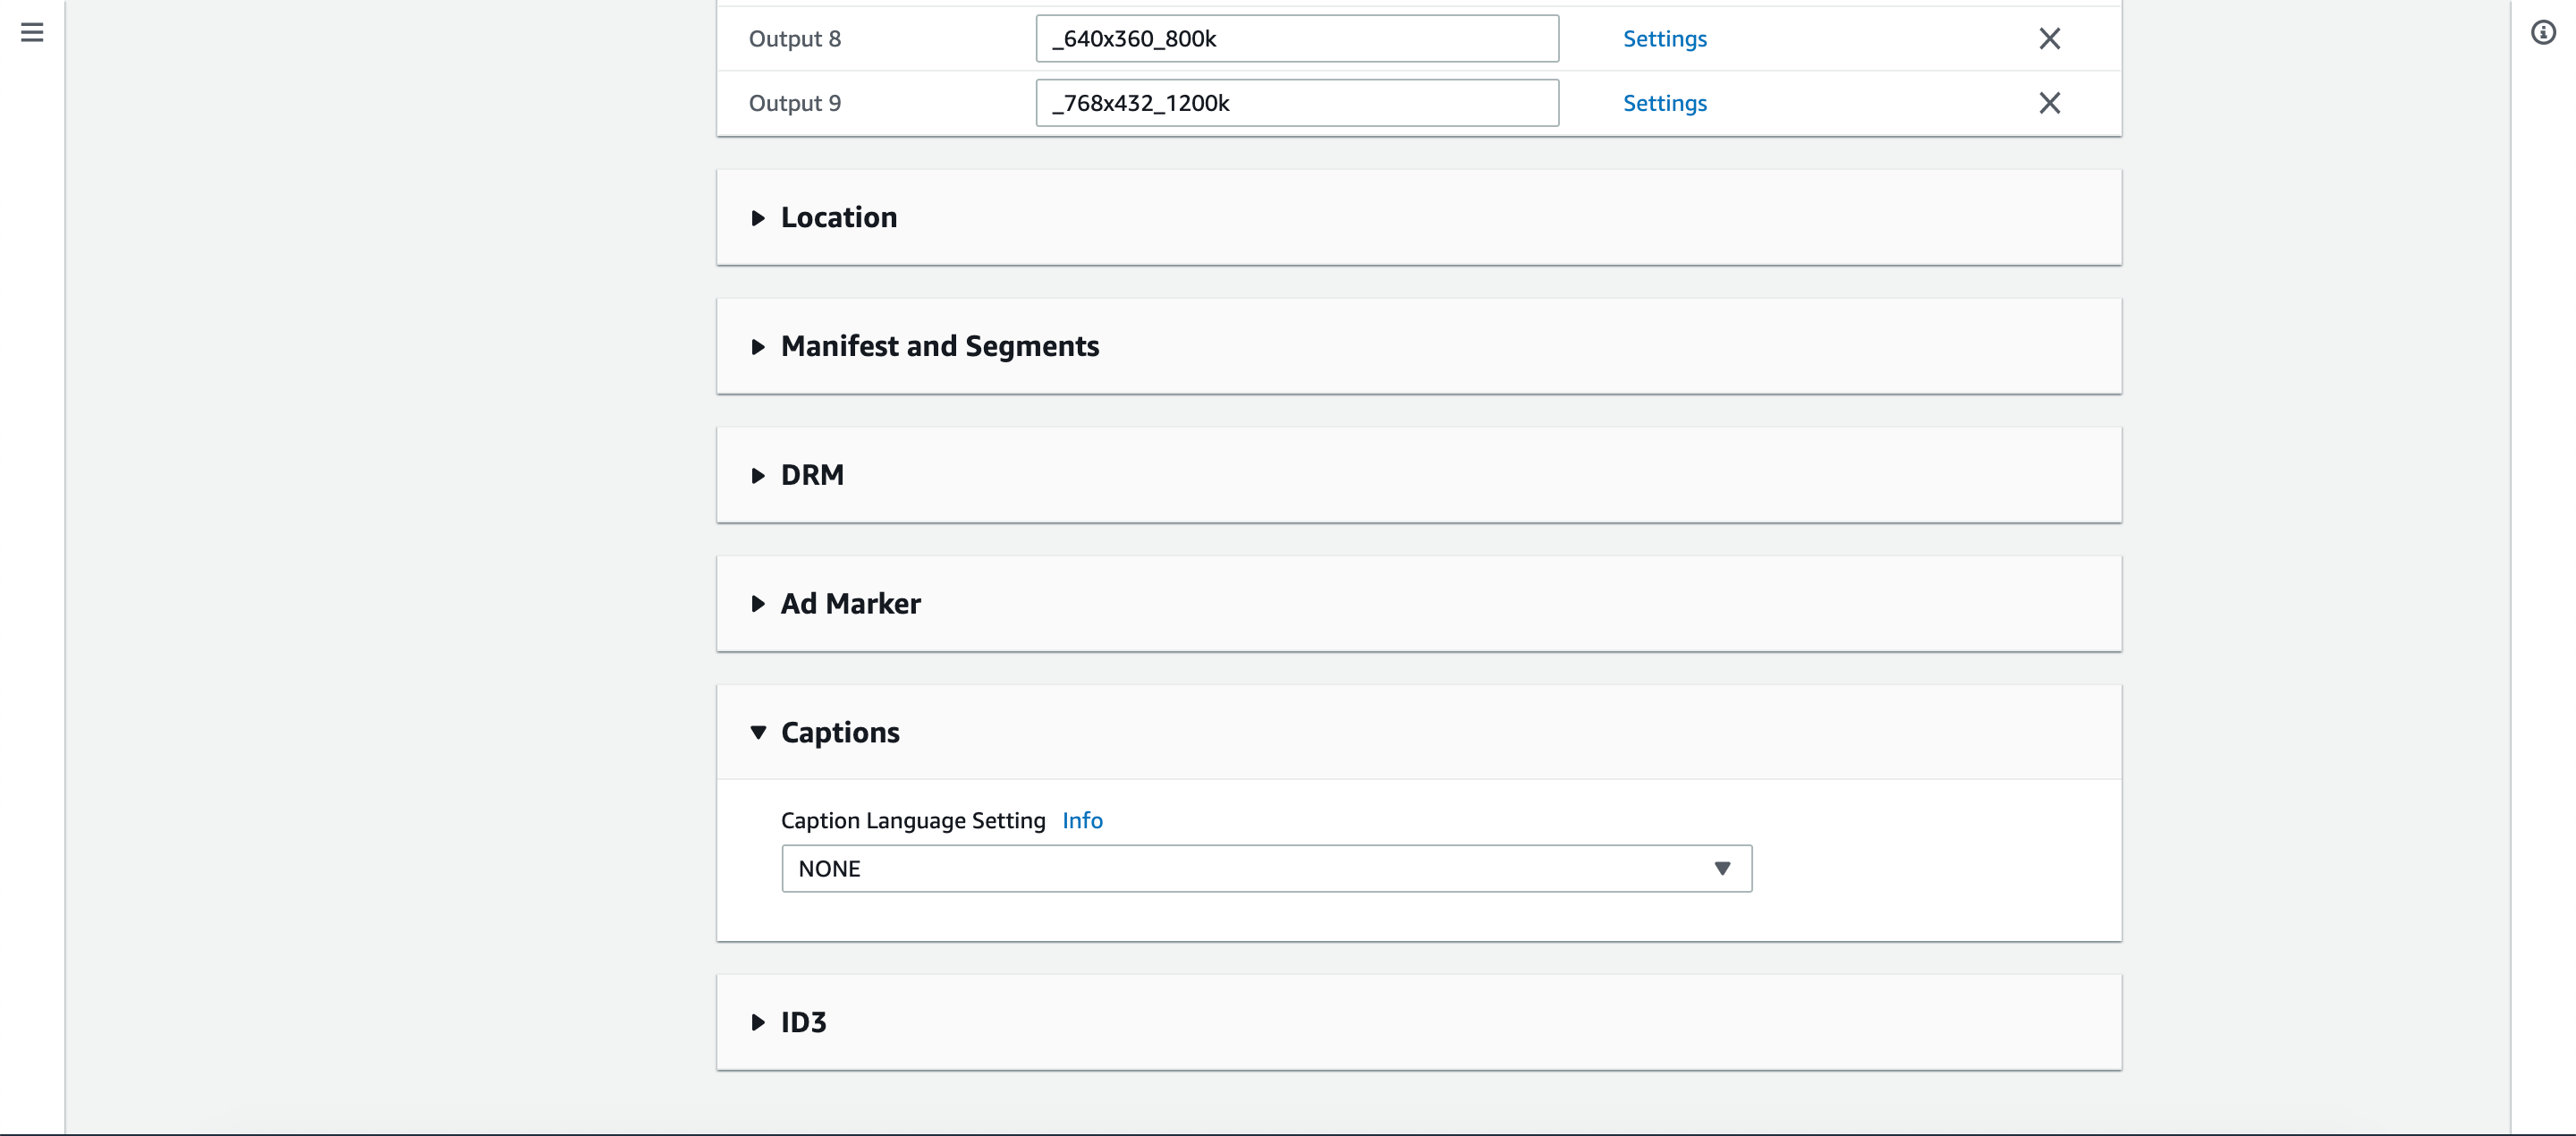
- Leave all the settings untouched and scroll down until you see Captions section. Extend the section and select NONE from the dropdown.
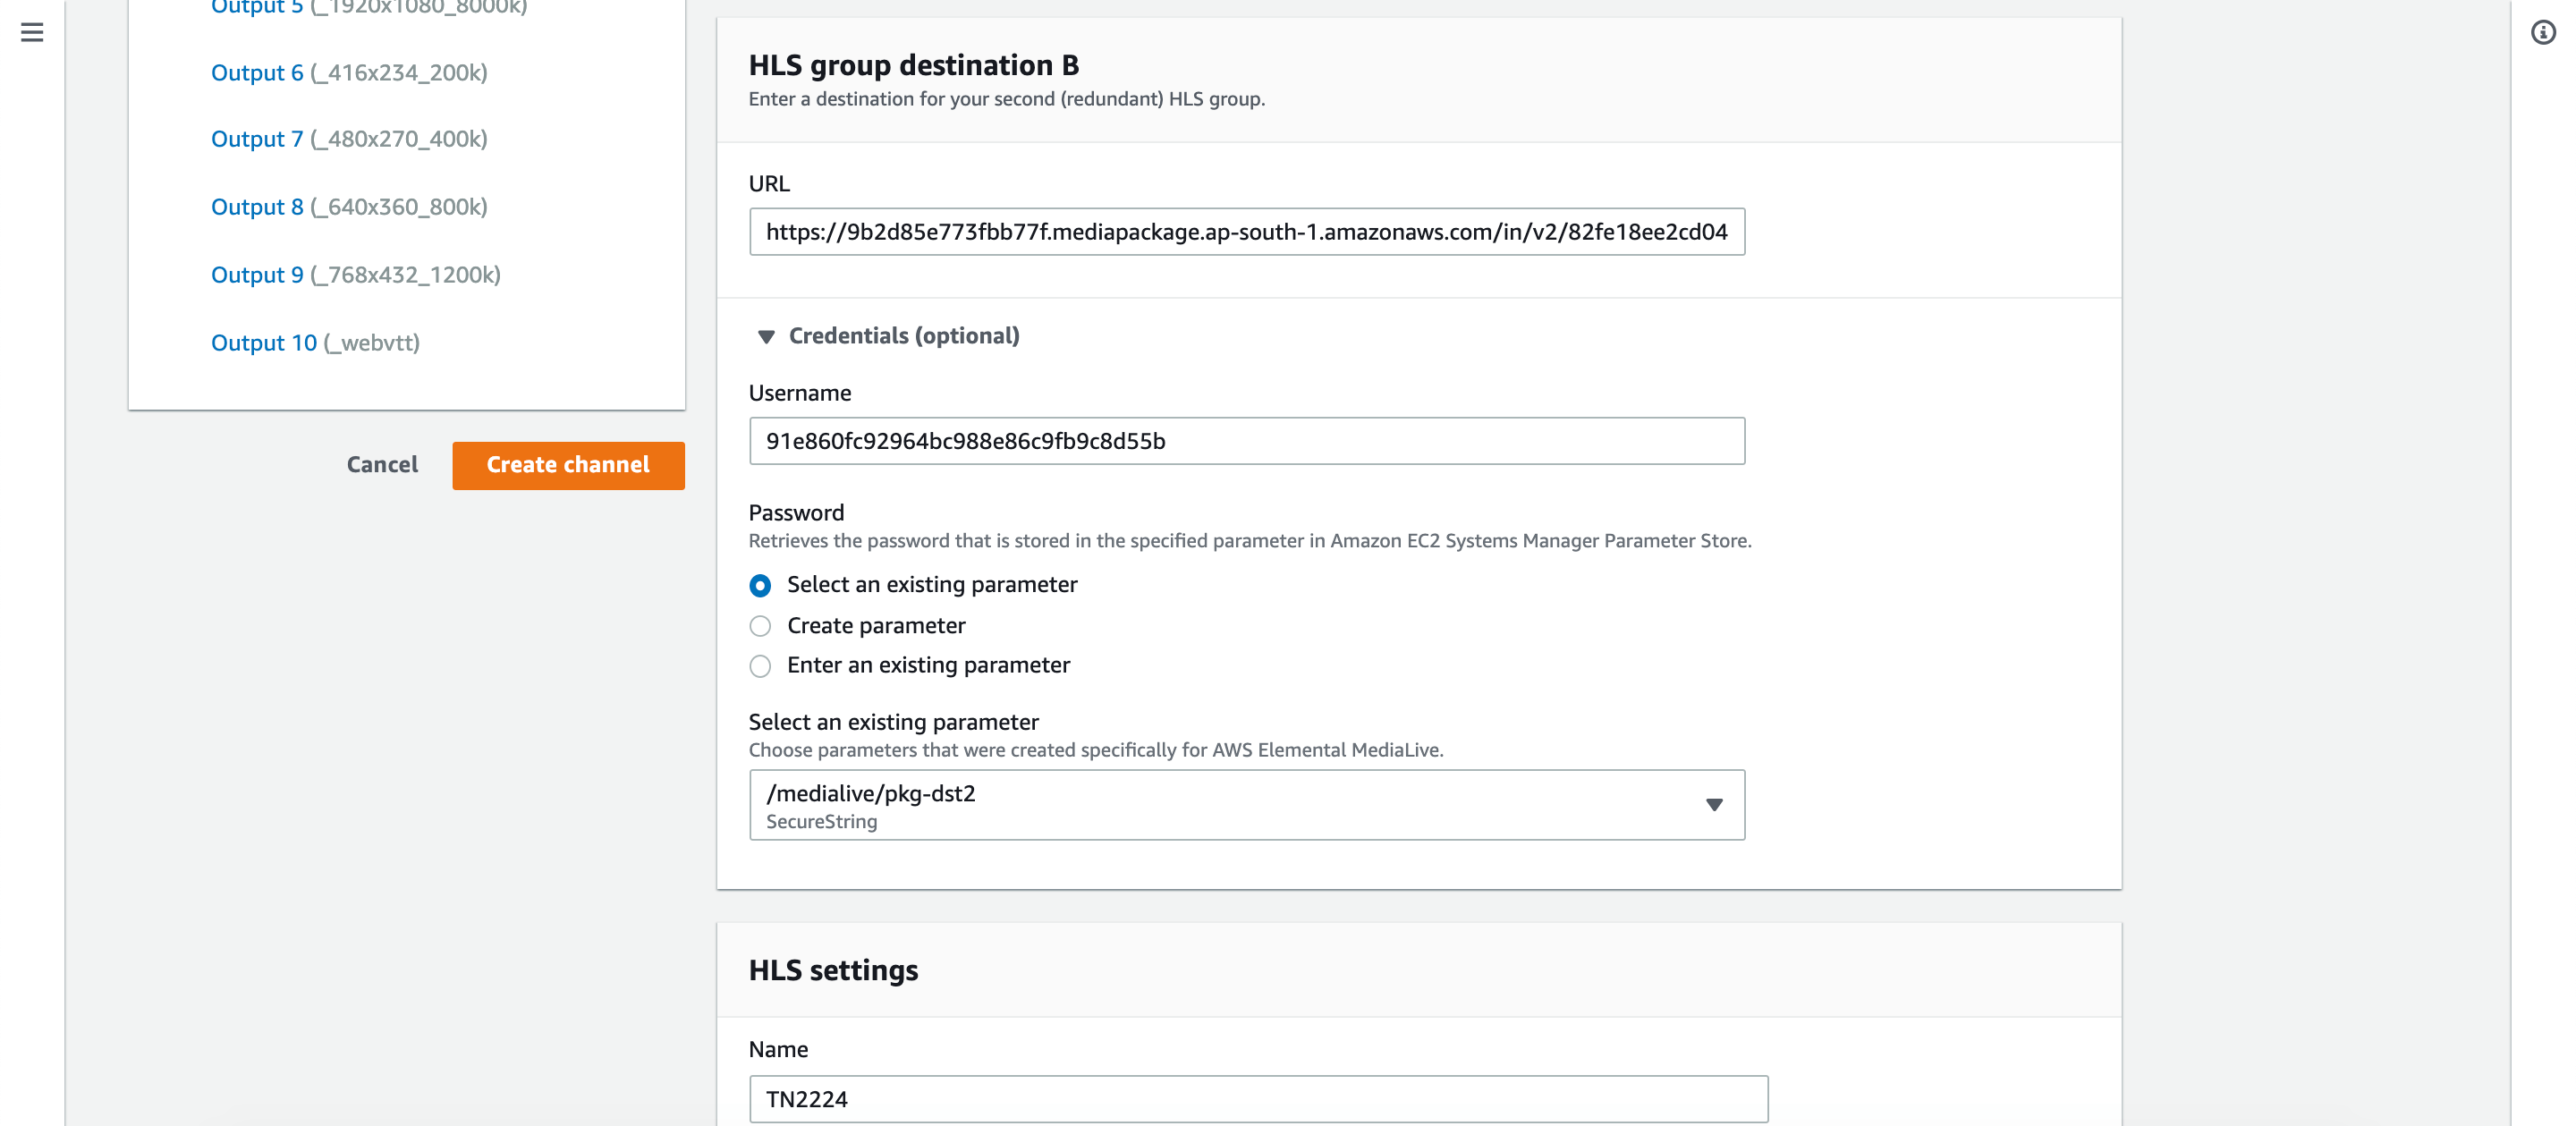
Scroll up and on your left side click on Create channel.
Note: In case you receive a validation error saying 'captionSelectorName "EmbeddedSelector" does not correspond to any provided CaptionSelector' please remove Output 10(_webvtt) under HLS outputs and try creating the channel.
It might take few seconds or minute to create the channel. Once, it is created your channel will be in idle state. We need to start the channel to start streaming video from our mobile phone. But before that we need to configure our mobile phone to send live stream to MediaLive.
I'm using Larix Broadcaster on my Android phone to stream video. You can free to choose any one for your phone based on availability.
You will need to configure the application to send live streaming on RTMP URL(s) we received earlier while creating input.
Once you configure your mobile application please need visit MediaLive and start the channel. This will take some time.
As soon as your channel is in running state, start sending video stream from your phone and visit AWS MediaPackage, scroll down until you see Endpoints section and click on Play under Preview column to see your live stream.
Note: You will experience lag depending on your bandwidth. In my case it was around 20-30 seconds.
Live streaming demo via my phone:
Voila! We have successfully setup a live streaming video using our mobile phone and AWS MediaLive and MediaPackage service.